Friday, 16 December 2011

Rocky Road

I have finally finished Uni for Christmas! I now have five weeks of obsessive baking ahead of me, once we get our oven back!

After a week of excessive studying, all I needed was some form of baking to relieve some stress. As I'm mostly limited to my microwave, Rocky Roads seemed the best option! I get the impression that, as long as they have chocolate and biscuits, Rocky Roads can have anything you like in them. Cue the creativity!


Unfortunately, pictures are limited as I made around 20 and most of them went with my dad to work. As my tray is quite small, the recipe gave me 12 decent size squares and a few in some cupcake cases. So, by the time I got up the next morning, all of the good ones had gone, hence the rubbish photos!

Needless to say, they were delicious. I've only ever had a pre-made, packaged rocky road (deprived childhood?) which are soft but these ones were chocolatey, crunchy and gooey, an all round hit!


We also got around to putting up our Christmas tree, Merry Christmas everyone!


Rocky Roads- recipe adapted from Good To Know

Ingredients:

100g unsalted butter
225g plain chocolate, broken into pieces
2tbsp golden syrup
2tbsp cocoa powder
2tbsp caster sugar
100g Maltesers
100g mixed milk and white chocolate chips- I used half choc chips and half fudge chunks
100g mini marshmallows
225g ginger biscuits, broken into pieces- I used digestive biscuits and found this was too many
Icing sugar to dust

Method:

Line a 20cm (8in) square cake tin with baking parchment.

In a small pan, heat the butter, plain chocolate, golden syrup, caster sugar, cocoa powder and stir together with a wooden spoon. Once melted together, leave to cool for 10 mins- This worked brilliantly in my microwave in 10 second bursts, painfully slow but worth it!

In a large bowl, place the Maltesers, milk and white chocolate chip, mini marshmallows, ginger biscuits and bind together with the melted chocolate sauce.
Pour into the lined tin and leave to set in the fridge for a minimum of 2 hrs.
Remove from cake tin and slice into 16 snack-sized rocky road bars- depends on how generous you are!
Dust the rocky road with icing sugar to serve.

Enjoy!

Saturday, 10 December 2011

Another Office Bake

Blog posts at the minute are few and far in between, I currently do not have an oven!! This is proving most difficult, especially as I have a long list of christmas bakes up my sleeve. Luckily, I managed to fit in some baking for my brother before the oven was removed and, as a thank you, received some wonderful flowers!


As always, apologies for the useless photos! Anyway, I made a chocolate victoria sponge not too long ago and it went down really well, better than any cake I normally make! So, when my brother asked me to make some cakes for work, I decided to make another sponge.


This time, I put vanilla buttercream in the middle and chocolate around the edges. I was a bit worried that the two buttercreams wouldn't work together as the vanilla one was quite strong so I had a taste (a big spoonful of the two, I can't lie) and they were lovely! I don't think it looked as good as the first time I made it, but apparently it went down really well :)


I also made some chocolate fudge cupcakes with chocolate fudge buttercream. Overkill, maybe, but they were really lovely and the fudge melted into the cake. I used my favourite cupcake recipe and substituted the white chocolate for fudge pieces.


I put them in festively coloured cupcake cases, and topped them with Betty Crocker chocolate fudge buttercream. I know this is cheating, but its just sooo tasty!!


I'm still struggling with my icing, if i do it from the middle outwards, it doesn't cover the whole cake. If I do it from the outside, I don't get a good peak, see what I mean?


They went down a storm, which is all I can ask for, I'll just keep practising!


Chocolate Victoria Sponge- adapted from Mary Berry's Baking Bible


Ingredients

For the sponge:
2 tablespoons cocoa powder
3 tablespoons boiling water
225g softened butter
225g caster sugar
4 large eggs
225g self raising flour
2 level teaspoons baking powder

For the filling and topping: I found this wasn't enough and made separate batches for the filling and topping
50g softened butter
175g sifted icing sugar
1 tablespoon milk


-Preheat the oven to 180C/Fan 160C/Gas 4
-Grease two 20cm sandwich tins and line the base of each with baking parchment
-Mix the cocoa and water in a mixing bowl then leave to cool slightly
-Measure the remaining ingredients into the bowl and beat until thoroughly blended- I've previously found that this method doesn't create a good rise so used the creaming method which worked brilliantly.
-Divide the mixture between the tins and level them out. Bake in the pre-heated oven for about 25 minutes or until well risen. The tops of the cakes should be springy when touched
-Leave to cool in the tins for a while then turn out and leave to cool on a wire rack.
-For the buttercream, beat the butter, icing sugar and milk until smooth- I found more milk and cocoa powder was necessary!
-Once the cake is cool, sandwich the cakes together with the buttercream and spread the rest on top- or cover the sides like I did
Enjoy!

Wednesday, 30 November 2011

Giant Cupcake- my first ever birthday cake!

I've recently become bored of being restricted as to what I can bake. As my parents and brother are on diets and my boyfriend is a bit of a picky eater, my creativity is limited. So, when my friend told me she was looking for a cake for her daughter's birthday, I begged her to let me attempt it. We agreed that it would be a large cupcake and the rest really was down to me.

I've never made a birthday cake and making it in a situation where I wouldn't be able taste it scared me a lot! I'm also a complete novice at decorating cakes so I had planned a test bake but I never got round to it. The cake went into the oven looking most promising!


There are a lot of things I wish I had realised beforehand that a practise run would have eliminated. Firstly, I wish I'd cooked it for longer, all the signs were there for a perfectly cooked cake but, once cooled, I began to worry. This then caused me to cut it in half (at a dodgy angle) and fill it with jam and buttercream which all merged together into one slop.

This stressed me out hugely and at one point my mum even suggested I start again!! I ended up walking away and going back to it a while later, in a much less stressed state. After some icing and a bit of decoration, the cake was completely transformed and I think it turned out really well, even if it does have a bit of a pointy tutu going on!


So, not much to report and not a lot of pictures but apparently it went down really well and Jayden absolutely loved it!


Giant Cupcake- adapted from GoodToKnow


Ingredients

For the giant cupcake:
450g softened butter   
450g caster sugar
8 large eggs
450g self-raising flour
4 level tsp baking powder
2 tsp of vanilla
3 tbsp milk
Giant cupcake tin- mine was silicone and I found this incredibly easy to turn out
For the cake covering:
250g white fondant icing
Pink food colouring
Strawberry jam- I used raspberry
For the buttercream:
110g unsalted butter, softened
500g icing sugar
60ml milk, room temperature
1tsp vanilla extract
Pink food colouring

Method:

Set the oven to 180ÂșC and grease the tin using cake release spray or groundnut oil.

Cream the butter and sugar and add the vanilla. Beat for about 5 minutes. Add one egg at a time with a third of the sieved flour and baking powder until it has gone then add the milk and beat slowly until it is mixed in.
Place half of the mixture in each side of the tin to about ¾ full and bake for 50 minutes. Times really depend on your own oven, so start to check the cake at 50 minutes, then every 10 minutes and do not remove from the oven until the cake is springy to the touch. This might take up to 1 hr 15 minutes.
Remove from the oven and let it cool for 20 minutes before tipping out. If the cake has overflowed or has risen too high don’t worry, you can trim this with a bread knife or a cake leveller. It’s easier to do this while it is still in the tin.

Hold the cooling rack tight over the top of the tin and turn them out to cool. Once the cake is totally cool (probably an hour or 2) you can start decorating it.
Colour and roll out the fondant icing to a ¼ of an inch thick. It has to be 25cm in length and 8cm high.
Melt some jam in the microwave and leaving the cake in the upside down position brush over the base of the cake. This helps the fondant stick. Place the fondant around the cake and trim the excess. You can fold a little over the top (which is the bottom) so you have a clean edge. Press your finger round the indentations so you get the shape of the base back. Then turn the cake (not gripping too hard or you will squash it) the right way up.

Beat the butter, icing sugar, milk and vanilla together in a bowl until light and fluffy. Put a third of the buttercream in another bowl and add pink food colouring to it. Reserve this for your buttercream roses. Spread jam on the bottom half of the cupcake, then the icing and sandwich the two pieces together.

Ice the top with the rest of the buttercream in a design that suits you- I didn't pipe the icing as I was too scared, so just spread it on using a palette knife and finished with a patterned edge side scraper

Add any decoration that you fancy- I used Love Hearts, Dolly Mixtures and some raspberry sherbet

Enjoy!

Monday, 21 November 2011

Baking for Children in Need

Firstly, my apologies for a lack of posts recently, baking has been put on hold once more for education but I have a multitude of bakes to blog about, so keep your eyes peeled!

As most of you will be aware, it was Children in Need on Friday and my Dad asked me to make something for a sale they were doing in his office. Although Lakeland were selling Pudsey cookie cutters, I felt that they were an unnecessary cost and probably limiting, as they printed the famous bandage onto the biscuit. I did have a teddy bear cutter that I bought from Fenwicks for 60p, which provided a perfect template for a teddy bear biscuit.


I used the same vanilla cookie recipe for these as I did for my Dracula biscuits and was reminded how much I absolutely hate it. It's sticky, hard to work with and, no matter how long it sits in the fridge before and after you cut your shapes, the biscuits ALWAYS spread into one large tray shaped biscuit. As per usual, I had a mad rush to re cut and carefully transfer the biscuits to a wire rack before they firmed up. Nightmare!

I iced an outline around the bear first so that it would remain in that shape, and then filled it in. Sometimes I can be naturally creative but by this point it was late and I was fed up, so a few Pudsey's looked a bit rubbish.


All in all, I feel that they look good, and apparently they were delicious! I also made some cupcakes by adapting a recipe from The Caked Crusader (which seems to be so versatile it's unreal) to be chocolate chip vanilla cupcakes and decorated them using some buttercream that I had left over from a birthday cake I made earlier that week- I'll update soon!


They look great but I'm still practicing my piping skills, any tips would much much appreciated! My dad says all of the cakes went down really well and they made lots of money for Children in Need so my good deed has been done!


Finally, I got a special mention from The Great British Baking Club which made me very happy!

Happy Baking!!

Monday, 31 October 2011

Halloween: Pumpkin Cupcakes and Dracula Biscuits

I hold fond memories of Halloween from when I was younger. Each year, my parents would take my brother and I to our respective scout and brownie parties, bob apples, carve pumpkins, the lot! I always dressed as a witch with an obligatory eyebrow pencil mole on my cheek and my mum's lipstick.

This year, I decided to do some Halloween cakes. I had them planned for weeks, I was to have chocolate cupcakes with a wickedly orange coloured swirl of icing. Unfortunately, I decided at the last minute to turn them into pumpkins, which didn't turn out brilliantly. My chocolate icing solidified, causing me to have to use white icing to paint the unconvincingly scary faces on.


As sad as it seems, the failure of these cupcakes played on my mind all week. Eventually, I forced myself to start my Halloween bakes from scratch. I got the idea of Dracula cupcakes from the Wilton website and used my regular Vanilla Cookie recipe.


I am really proud of myself with these, they taste and look great. They could even be a bit spooky!


Happy Halloween!!

Monday, 17 October 2011

Viennese Whirls

Viennese Whirls or Melting Moments? Hmmm...

These biscuits are an amalgamation of a few recipes, the main one being vanilla butter biscuits from The Caked Crusader, as always! I'd like to point out here that I do own recipe books, you've just got to stick to what you know, right?


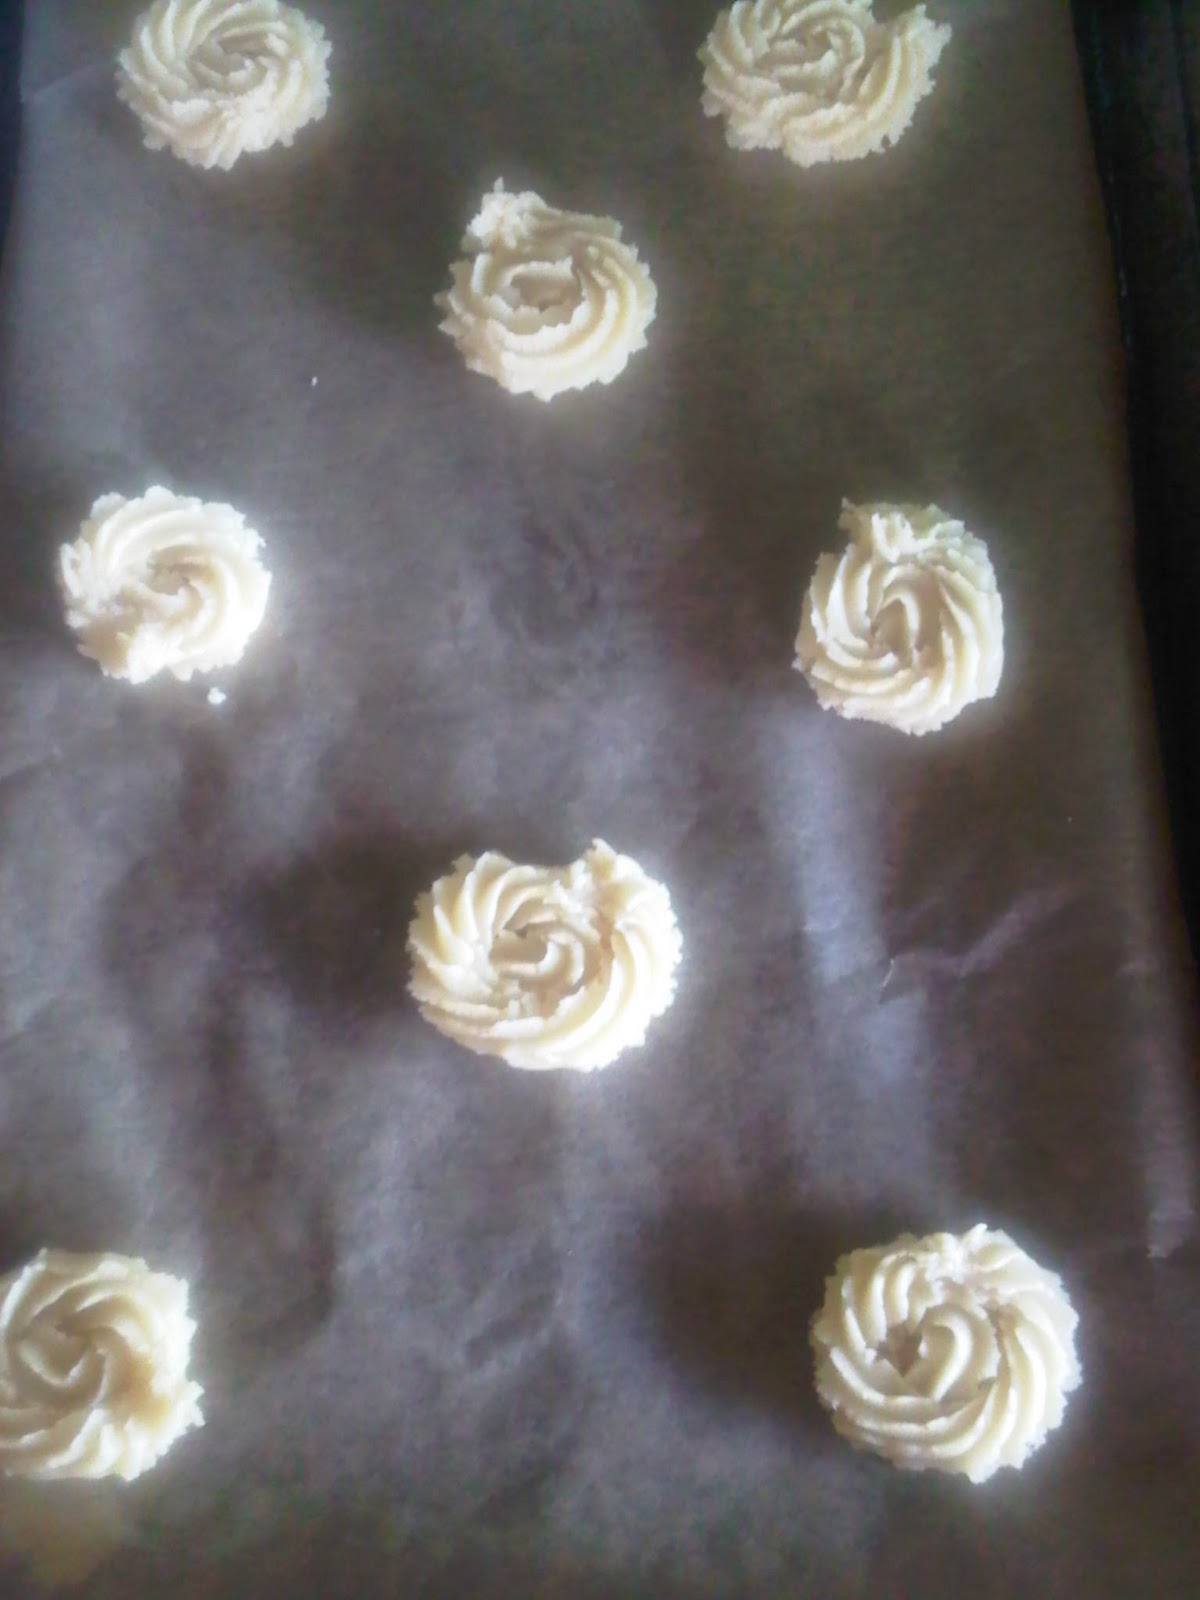
I really struggled to pipe these into a delicate whirl as I had hoped too but I gradually got the hang of it and I'm pretty pleased with the results! At first, I panicked over the small amount of dough that the recipe made and I made them quite small but they spread out to a perfect size whilst cooking, and kept their shape too!


For the filling, I used Hartley's seedless raspberry jam (nobody likes seeds in their teeth!) and a vanilla butter cream from a recipe by SilverSpoon. I added my vanilla gradually, though, and to my own taste as I worried a full tablespoon of vanilla would be too much.


I made the mistake of stirring the jam in order to make it smoother and it was too runny, this only added to the look though, at least according to my boyfriend! Keep 'em sweet and all that...


Tada! They taste amazing :)


Recipe adapted from The CC and SilverSpoon

Ingredients:

For the biscuits:

115g unsalted butter, at room temperature
3 tablespoons icing sugar
150g plain flour
2 teaspoons vanilla extract

For the filling:

100g Butter (softened)
200g Icing Sugar (sieved)
1 tbsp Milk
1 tbsp vanilla extract
Any jam of your choice

Method:
Preheat the oven to 180°C/fan oven 160°C/350°F/Gas mark 4
Line two baking trays with baking paper- I used a large baking sheet
Beat the butter and sugar until light and fluffy- this will take a few minutes so don’t skimp!
Beat in the flour and vanilla and mix until you have a dough
Fill a piping bag and pipe swirls onto the lined baking trays, they can also be piped into fingers
Sprinkle some sugar over the biscuits, making sure that some settles into the grooves
Bake for 15-20 minutes or until the biscuits are golden brown- mine took 18 or so minutes
Leave to cool on the baking sheet for 10 minutes before moving onto a wire rack to cool completely to allow them to harden up
Meanwhile, make the butter cream. In a large bowl beat the butter with a wooden spoon or an electric whisk until light and fluffy
Gradually mix in the icing sugar until smooth and creamy
Add the vanilla and sufficient milk to give a fairly firm spreading consistency
Choose two biscuits that roughly match each other in size, spread jam on one half and pipe butter cream onto the other
Sandwich the two together and press gently- mine needed setting in the fridge for a while
Enjoy!

Wednesday, 12 October 2011

Happy Birthday Pa!

Today is my daddy's birthday :) I love my dad, he is beyond amazing and he deserves nice cake! Although he's a dedicated dieter these days, I asked him if I could make him a birthday cake and he said 'no thanks, but I'd like some for the office please', (an example of how generous he is!) and stated it needed to be chocolate fudge cake. Lovely, I thought, I'll make my famous Death By Chocolate cake. Stupidly, I forgot to add the butter to this cake and the results aren't even worth documenting!

Note to self: never bake when ill!

After getting a tad too annoyed, I frantically hopped on the computer and paid a visit to The Caked Crusader who, in true superhero style, saved me from a very sticky situation.


I chose this recipe for a few reasons; it used all of the ingredients I had without needing to go to the shops, it was easily doubled and they looked delicious!

As you can see, the batter for these cupcakes was deliciously smooth, even though it used cocoa powder as opposed to chocolate.


For once, all of my cupcakes came out evenly, and a great size, I love this recipe!


I cheated a little and used Betty Crocker's Chocolate Fudge icing but this was because it is truly beautiful and it topped off a great bake in a great way! I still need a bit of work on my icing skills, I would have liked the icing all over the cake!

All in all, a very nice bake, a very happy office and a very happy daddy! Thanks CC!


Recipe from The Caked Crusader, you can find it here in it's original form

Ingredients

These quantities will make 12 cupcake sponges – the mix doubles up easily should you wish to make 24

125g unsalted butter, at room temperature
125g caster sugar
2 eggs
100g self raising flour
3 tablespoons cocoa powder
2 tablespoon milk
50g white chocolate chips- I didn't put any in as I had none


Method:

Preheat the oven to 190°C/fan oven 170°C/375°F/Gas mark 5. Line a cupcake pan with paper cases
Beat together the butter and sugar until light and fluffy then beat in the eggs, flour, cocoa and milk
When the mixture is smooth and well combined, stir in the chocolate chips
Spoon the batter into the paper cases
Bake for 12-15 minutes or until a skewer inserted into the cupcakes comes out clean. Mine took around 17 minutes, which didn't burn them!
Remove from the tin as soon as possible and leave to cool on a wire rack – removing from the tin is important as the heat of the tin will mean that the cupcakes continue to cook
Pipe or spread your chosen icing over the chocolate cupcakes and decorate as you please
Enjoy!
Related Posts Plugin for WordPress, Blogger...