Where on earth have these little beauties been all of my life?! I am absolutely in love!
I've never been a lover of anything 'spicy' but, for a while now, I have been on a complete cinnamon binge. I made a large batch of cinnamon sugar for pancake day and it's been sitting brewing into something wonderful ever since. As unhealthy as it is, I'm loving this on hot, buttered toast!
So, as the cravings continued, I decided to make Snickerdoodles! These are the most wonderful, sugary, cinnamony mouthfuls you could ever imagine. When googling snickerdoodles, The Caked Crusader came right up. As you all know, I'm a great fan of the CC and, having looked at a few recipes, decided to follow hers. I promise this obsession will stop at one point, her recipes are just brilliant to have in your files!
I get the impression that each recipe produces a different sort of snickerdoodle, some cake like, some more flat and biscuity. This recipe gave me a crunchy exterior with a wonderful cake interior!
I had so much fun rolling these around in the sugar, even though my hands turned a very unattractive yellow in the process! I didn't follow the recipe exactly and used my own cinnamon sugar which I made by using a ratio of 2:1 (sugar:cinnamon)
These biscuits have gone down brilliantly in my house, even the non cinnamon lovers have been converted! My favourite thing is that both my brother and my dad complained they had nothing to do with snickers, oh dear!
Snickerdoodles- from The Caked Crusader
Ingredients
For the biscuits:
125g unsalted
butter, room temperature
100g caster sugar
1 egg
2 tsp vanilla
extract
250g plain flour
1 tsp baking powder
1 tsp ground
nutmeg- I omitted this!
For the sugar coating:
2 tsp caster sugar
1
tsp cinnamon powder
Method
- Preheat the
oven to 180°C/fan oven 160°C/350°F/Gas mark 4
- Line two baking trays with
baking paper
- Cream together the butter and sugar until light and
fluffy. Beat in the egg and vanilla
- Stir in the flour, baking powder
and nutmeg until you have a sticky but well combined dough
- On a plate,
stir together the sugar and cinnamon to make the coating- this would have worked well in a bowl too!
- Taking a teaspoon
of the dough at a time, roll between your palms to make a little ball. Roll
the ball around on the plate with the coating and ensure it is completely
covered
- Place on the baking sheet. Place a maximum of 12 biscuits per
sheet as they will expand while cooking. Repeat until all the dough is
used
- Bake for 15 minutes or until the biscuit is golden
brown and slightly cracked on top
- Let the
biscuits firm up on the tray before you move them to cool completely on a wire
rack
Enjoy!!
Showing posts with label The Caked Crusader. Show all posts
Thursday, 1 March 2012
Sunday, 26 February 2012
Kinder Bueno Cupcakes- Take 2!
Every time I check my blog statistics, the numbers for my original Kinder Bueno cupcakes keep going up and up. This makes me feel like a very poor blogger as they really have nothing to do with the delicious bar besides a chunk on top!
And so along came the huge and continuing urge to redeem myself and create a real Kinder Bueno cupcake! This was easy; chocolate cupcake and hazelnut buttercream. But then came the quest on how to create the 'smooth milky and hazelnut' buttercream. At first I thought I'd use hazelnut flavoured Baileys but was unable to find a miniature version. I also wanted to eliminate alcohol so Frangelico was out of the question! Then, after what seemed like hours trailing around Newcastle, the idea struck- hazelnut syrup...
I used my favourite chocolate cupcake recipe from The Caked Crusader and also followed her step by step guide for making Swiss Meringue Buttercream which is hugely helpful even after you've made it several times!
The hazelnut syrup works really well with the buttercream, and provided a really subtle flavour, just like a Kinder Bueno! I added around 2 and a half teaspoons of syrup although you could add more for a stronger flavour
I'm really happy with these cupcakes, I feel like I've finally redeemed myself! Happy baking everyone!
And so along came the huge and continuing urge to redeem myself and create a real Kinder Bueno cupcake! This was easy; chocolate cupcake and hazelnut buttercream. But then came the quest on how to create the 'smooth milky and hazelnut' buttercream. At first I thought I'd use hazelnut flavoured Baileys but was unable to find a miniature version. I also wanted to eliminate alcohol so Frangelico was out of the question! Then, after what seemed like hours trailing around Newcastle, the idea struck- hazelnut syrup...
I used my favourite chocolate cupcake recipe from The Caked Crusader and also followed her step by step guide for making Swiss Meringue Buttercream which is hugely helpful even after you've made it several times!
The hazelnut syrup works really well with the buttercream, and provided a really subtle flavour, just like a Kinder Bueno! I added around 2 and a half teaspoons of syrup although you could add more for a stronger flavour
I'm really happy with these cupcakes, I feel like I've finally redeemed myself! Happy baking everyone!
Monday, 21 November 2011
Baking for Children in Need
Firstly, my apologies for a lack of posts recently, baking has been put on hold once more for education but I have a multitude of bakes to blog about, so keep your eyes peeled!
As most of you will be aware, it was Children in Need on Friday and my Dad asked me to make something for a sale they were doing in his office. Although Lakeland were selling Pudsey cookie cutters, I felt that they were an unnecessary cost and probably limiting, as they printed the famous bandage onto the biscuit. I did have a teddy bear cutter that I bought from Fenwicks for 60p, which provided a perfect template for a teddy bear biscuit.
I used the same vanilla cookie recipe for these as I did for my Dracula biscuits and was reminded how much I absolutely hate it. It's sticky, hard to work with and, no matter how long it sits in the fridge before and after you cut your shapes, the biscuits ALWAYS spread into one large tray shaped biscuit. As per usual, I had a mad rush to re cut and carefully transfer the biscuits to a wire rack before they firmed up. Nightmare!
I iced an outline around the bear first so that it would remain in that shape, and then filled it in. Sometimes I can be naturally creative but by this point it was late and I was fed up, so a few Pudsey's looked a bit rubbish.
All in all, I feel that they look good, and apparently they were delicious! I also made some cupcakes by adapting a recipe from The Caked Crusader (which seems to be so versatile it's unreal) to be chocolate chip vanilla cupcakes and decorated them using some buttercream that I had left over from a birthday cake I made earlier that week- I'll update soon!
They look great but I'm still practicing my piping skills, any tips would much much appreciated! My dad says all of the cakes went down really well and they made lots of money for Children in Need so my good deed has been done!
Finally, I got a special mention from The Great British Baking Club which made me very happy!
Happy Baking!!
As most of you will be aware, it was Children in Need on Friday and my Dad asked me to make something for a sale they were doing in his office. Although Lakeland were selling Pudsey cookie cutters, I felt that they were an unnecessary cost and probably limiting, as they printed the famous bandage onto the biscuit. I did have a teddy bear cutter that I bought from Fenwicks for 60p, which provided a perfect template for a teddy bear biscuit.
I used the same vanilla cookie recipe for these as I did for my Dracula biscuits and was reminded how much I absolutely hate it. It's sticky, hard to work with and, no matter how long it sits in the fridge before and after you cut your shapes, the biscuits ALWAYS spread into one large tray shaped biscuit. As per usual, I had a mad rush to re cut and carefully transfer the biscuits to a wire rack before they firmed up. Nightmare!
I iced an outline around the bear first so that it would remain in that shape, and then filled it in. Sometimes I can be naturally creative but by this point it was late and I was fed up, so a few Pudsey's looked a bit rubbish.
All in all, I feel that they look good, and apparently they were delicious! I also made some cupcakes by adapting a recipe from The Caked Crusader (which seems to be so versatile it's unreal) to be chocolate chip vanilla cupcakes and decorated them using some buttercream that I had left over from a birthday cake I made earlier that week- I'll update soon!
They look great but I'm still practicing my piping skills, any tips would much much appreciated! My dad says all of the cakes went down really well and they made lots of money for Children in Need so my good deed has been done!
Finally, I got a special mention from The Great British Baking Club which made me very happy!
Happy Baking!!
Monday, 17 October 2011
Viennese Whirls
Viennese Whirls or Melting Moments? Hmmm...
These biscuits are an amalgamation of a few recipes, the main one being vanilla butter biscuits from The Caked Crusader, as always! I'd like to point out here that I do own recipe books, you've just got to stick to what you know, right?
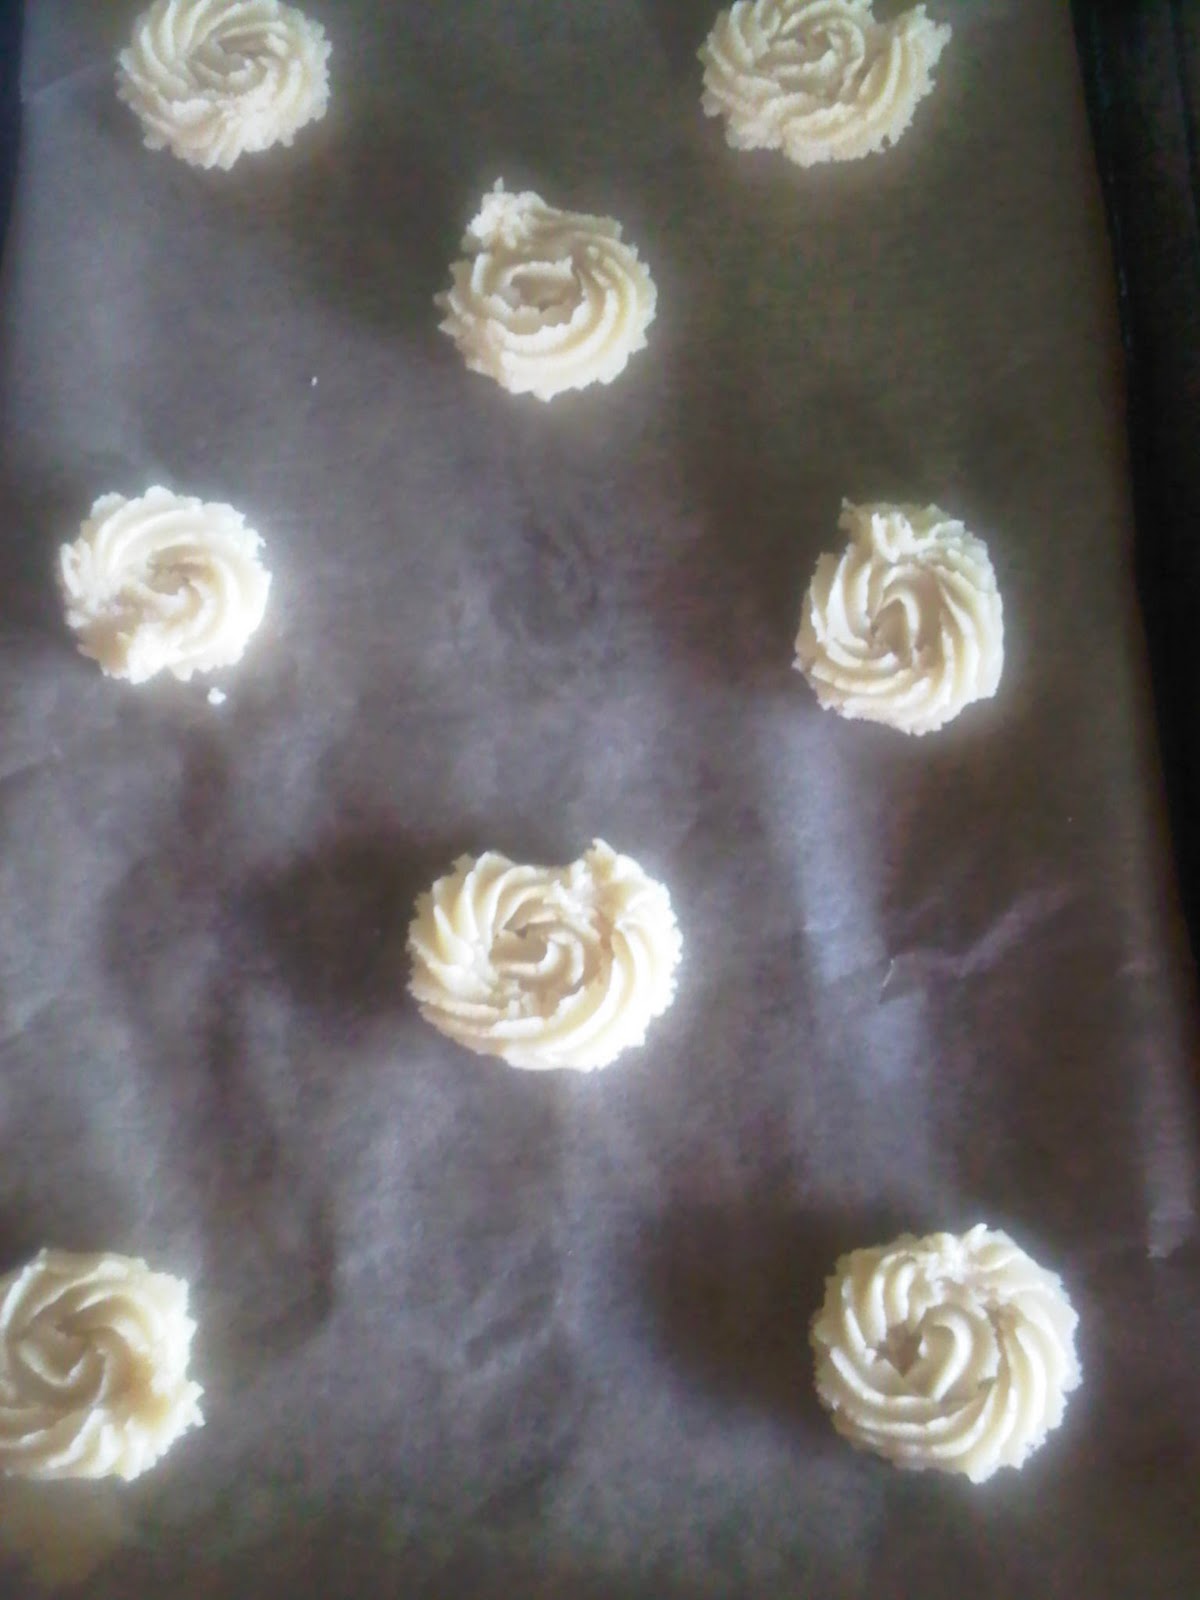
I really struggled to pipe these into a delicate whirl as I had hoped too but I gradually got the hang of it and I'm pretty pleased with the results! At first, I panicked over the small amount of dough that the recipe made and I made them quite small but they spread out to a perfect size whilst cooking, and kept their shape too!
For the filling, I used Hartley's seedless raspberry jam (nobody likes seeds in their teeth!) and a vanilla butter cream from a recipe by SilverSpoon. I added my vanilla gradually, though, and to my own taste as I worried a full tablespoon of vanilla would be too much.
I made the mistake of stirring the jam in order to make it smoother and it was too runny, this only added to the look though, at least according to my boyfriend! Keep 'em sweet and all that...
Tada! They taste amazing :)
Recipe adapted from The CC and SilverSpoon
Ingredients:
For the biscuits:
115g unsalted butter, at room temperature
3 tablespoons icing sugar
150g plain flour
2 teaspoons vanilla extract
For the filling:
1 tbsp Milk
1 tbsp vanilla extract
Any jam of your choice
Method:
Preheat the oven to 180°C/fan oven 160°C/350°F/Gas mark 4
Line two baking trays with baking paper- I used a large baking sheet
Beat the butter and sugar until light and fluffy- this will take a few minutes so don’t skimp!
Beat in the flour and vanilla and mix until you have a dough
Fill a piping bag and pipe swirls onto the lined baking trays, they can also be piped into fingers
Sprinkle some sugar over the biscuits, making sure that some settles into the grooves
Bake for 15-20 minutes or until the biscuits are golden brown- mine took 18 or so minutes
Leave to cool on the baking sheet for 10 minutes before moving onto a wire rack to cool completely to allow them to harden up
Meanwhile, make the butter cream. In a large bowl beat the butter with a wooden spoon or an electric whisk until light and fluffy
Gradually mix in the icing sugar until smooth and creamy
Add the vanilla and sufficient milk to give a fairly firm spreading consistency
Choose two biscuits that roughly match each other in size, spread jam on one half and pipe butter cream onto the other
Sandwich the two together and press gently- mine needed setting in the fridge for a while
Enjoy!
These biscuits are an amalgamation of a few recipes, the main one being vanilla butter biscuits from The Caked Crusader, as always! I'd like to point out here that I do own recipe books, you've just got to stick to what you know, right?
I really struggled to pipe these into a delicate whirl as I had hoped too but I gradually got the hang of it and I'm pretty pleased with the results! At first, I panicked over the small amount of dough that the recipe made and I made them quite small but they spread out to a perfect size whilst cooking, and kept their shape too!
For the filling, I used Hartley's seedless raspberry jam (nobody likes seeds in their teeth!) and a vanilla butter cream from a recipe by SilverSpoon. I added my vanilla gradually, though, and to my own taste as I worried a full tablespoon of vanilla would be too much.
I made the mistake of stirring the jam in order to make it smoother and it was too runny, this only added to the look though, at least according to my boyfriend! Keep 'em sweet and all that...
Tada! They taste amazing :)
Recipe adapted from The CC and SilverSpoon
Ingredients:
For the biscuits:
115g unsalted butter, at room temperature
3 tablespoons icing sugar
150g plain flour
2 teaspoons vanilla extract
For the filling:
100g Butter (softened)
200g Icing Sugar (sieved)1 tbsp Milk
1 tbsp vanilla extract
Any jam of your choice
Method:
Preheat the oven to 180°C/fan oven 160°C/350°F/Gas mark 4
Line two baking trays with baking paper- I used a large baking sheet
Beat the butter and sugar until light and fluffy- this will take a few minutes so don’t skimp!
Beat in the flour and vanilla and mix until you have a dough
Fill a piping bag and pipe swirls onto the lined baking trays, they can also be piped into fingers
Sprinkle some sugar over the biscuits, making sure that some settles into the grooves
Bake for 15-20 minutes or until the biscuits are golden brown- mine took 18 or so minutes
Leave to cool on the baking sheet for 10 minutes before moving onto a wire rack to cool completely to allow them to harden up
Meanwhile, make the butter cream. In a large bowl beat the butter with a wooden spoon or an electric whisk until light and fluffy
Gradually mix in the icing sugar until smooth and creamy
Add the vanilla and sufficient milk to give a fairly firm spreading consistency
Choose two biscuits that roughly match each other in size, spread jam on one half and pipe butter cream onto the other
Sandwich the two together and press gently- mine needed setting in the fridge for a while
Enjoy!
Wednesday, 12 October 2011
Happy Birthday Pa!
Today is my daddy's birthday :) I love my dad, he is beyond amazing and he deserves nice cake! Although he's a dedicated dieter these days, I asked him if I could make him a birthday cake and he said 'no thanks, but I'd like some for the office please', (an example of how generous he is!) and stated it needed to be chocolate fudge cake. Lovely, I thought, I'll make my famous Death By Chocolate cake. Stupidly, I forgot to add the butter to this cake and the results aren't even worth documenting!
Note to self: never bake when ill!
After getting a tad too annoyed, I frantically hopped on the computer and paid a visit to The Caked Crusader who, in true superhero style, saved me from a very sticky situation.
125g unsalted butter, at room temperature
125g caster sugar
2 eggs
100g self raising flour
3 tablespoons cocoa powder
2 tablespoon milk
50g white chocolate chips- I didn't put any in as I had none
Method:
Spoon the batter into the paper cases
Bake for 12-15 minutes or until a skewer inserted into the cupcakes comes out clean. Mine took around 17 minutes, which didn't burn them!
Remove from the tin as soon as possible and leave to cool on a wire rack – removing from the tin is important as the heat of the tin will mean that the cupcakes continue to cook
Pipe or spread your chosen icing over the chocolate cupcakes and decorate as you please
Enjoy!
Note to self: never bake when ill!
After getting a tad too annoyed, I frantically hopped on the computer and paid a visit to The Caked Crusader who, in true superhero style, saved me from a very sticky situation.
I chose this recipe for a few reasons; it used all of the ingredients I had without needing to go to the shops, it was easily doubled and they looked delicious!
As you can see, the batter for these cupcakes was deliciously smooth, even though it used cocoa powder as opposed to chocolate.
For once, all of my cupcakes came out evenly, and a great size, I love this recipe!
I cheated a little and used Betty Crocker's Chocolate Fudge icing but this was because it is truly beautiful and it topped off a great bake in a great way! I still need a bit of work on my icing skills, I would have liked the icing all over the cake!
All in all, a very nice bake, a very happy office and a very happy daddy! Thanks CC!
Recipe from The Caked Crusader, you can find it here in it's original form
Ingredients
These quantities will make 12 cupcake sponges – the mix doubles up easily should you wish to make 24
125g unsalted butter, at room temperature
125g caster sugar
2 eggs
100g self raising flour
3 tablespoons cocoa powder
2 tablespoon milk
50g white chocolate chips- I didn't put any in as I had none
Preheat the oven to 190°C/fan oven 170°C/375°F/Gas mark 5. Line a cupcake pan with paper cases
Beat together the butter and sugar until light and fluffy then beat in the eggs, flour, cocoa and milk
When the mixture is smooth and well combined, stir in the chocolate chipsSpoon the batter into the paper cases
Bake for 12-15 minutes or until a skewer inserted into the cupcakes comes out clean. Mine took around 17 minutes, which didn't burn them!
Remove from the tin as soon as possible and leave to cool on a wire rack – removing from the tin is important as the heat of the tin will mean that the cupcakes continue to cook
Pipe or spread your chosen icing over the chocolate cupcakes and decorate as you please
Enjoy!
Saturday, 27 August 2011
Cake in a Cake
I came across this idea on Bake it in a Cake and was immediately desperate to give it a go. Unfortunately, the website was undergoing construction and there were no recipes regarding how to make this cake. Alongside this, they had made cupcake versions and I wanted to make a full cake.
I googled the idea and came across a version on Butter Hearts Sugar. This recipe was for a loaf cake which was what I was looking for but it used heart shaped cutters that I didn't have. This was the only website which clearly explained the steps in making such a creation, go have a look!
Due to no recipes, no heart shaped cutters and generally no idea whatsoever, this cake became completely about compromise which unfortunately became it's downfall.
Although all of the signs were correct, the cake smelt eggy and to me, that means undercooked. I figured this would be ok as it was going back in the oven and continued...
I used my cutters and got as many as I could from the sponge, which turned out to be just enough for my small loaf pan. I then layered half of the original batter into the pan and started to assemble the circles
I then layered the remaining batter over the top and the secret was concealed!
This went in the oven and, although the recipe said 1 hour 20 minutes, this was for a round sponge and my loaf tin was rather small. After about an hour, a skewer was coming out clean.
The sponge recipe from The CC came with a syrup and a buttercream but I chose not to use these as the amount of buttercream was too much to cover such a small cake and, as it was nearing midnight, I really couldn't be bothered to make the syrup (sorry!).
Having gone to bed with an unfrosted cake (not literally), I decided it needed a bit of buttercream as when I cut into the cake, it was incredibly dry. This may well have been because I chose to ignore the use of the syrup but I genuinely believe it was the fact that some of the cake is baked twice. The white (and cooked once) sponge is tasty but the red sponge is dry and tastes peculiar, obviously not helped by being cooked twice, once undercooked.
I whipped up a buttercream (also from The CC), but put in some strawberry jam to match the reddish theme. This provided a good colour but little flavour. I figured the cake had been so much about compromise that a little more wouldn't hurt and I added 1/4 teaspoon of Strawberry flavouring.
The cake is also too crumbly to cut!
With thanks to Bake it in a Cake, The Caked Crusader and Butter Hearts Sugar for all of their recipes and my complete apologies for ruining what could have been an awesome cake!!
I have provided a link to all of the full recipes above but have written the recipe below in the way that I used them.
Post Blog Update: I allowed the cake and buttercream to do their thing in the fridge over night and the buttercream has matured somewhat into a more delicate flavour. The cake has also moistened completely and has an all round better flavour. Upon reflection, I really like this cake!!
Ingredients:
For the cake:
250g unsalted butter- room temperature
250g golden caster sugar- I used half regular and half golden as I had run out of golden
1 teaspoon vanilla extract
Seeds scraped from 1 vanilla pod- I substituted these with another teaspoon of vanilla extract
5 eggs
85g plain flour
100g full fat Greek yoghurt
250g self raising flour
3 tablespoons milk- I used semi skimmed
A few drops of red food colouring
For the buttercream:
80g unsalted butter- room temperature
200g icing sugar
1-2 tablespoons of milk- I used two
Strawberry jam- I used 3, unseeded is best
A few drops of strawberry flavouring- I found 1/4 teaspoon was far too much
Method:
Preheat the oven to 160˚C/fan oven 140˚C/320˚F/Gas mark 3
Lightly grease a 8 inch square cake tin and a loaf tin
Place the butter, sugar and vanilla together in a bowl and beat until they are light and fluffy; you will also see the colour changing to a pale cream. Don’t skimp on this stage as it’s important to get lots of air into the mixBeat in the eggs, one at a time. If the mix starts to curdle spoon in some of the plain flour
Beat in the yoghurt
Fold in both flours using a metal spoon; this gives you a better cutting edge than a wooden spoon. I just continued with my KitchenAid flat beater
Fold in the milk
Put 1/3 of the mixture into a separate bowl and colour with red food colouring. I went all out here and used quite a few drops!
Spread the red cake mix into the square cake tin and bake for about 20 minutes or until it springs back when poked in the centre
Allow the red cake to half cool in the pan before turning it out onto a wire rack to cool completely. Once the cake is cold cut out your chosen shape using a cookie cutter
Pour half of the remaining cake mixture into the loaf cake tin and smooth out. Press the hearts cutouts in a upright line down the middle of the pan
Pour over the rest of the cake mix and smooth the surface
Place in the oven for 1 hour and 20 minutes or until a skewer comes out clean- mine took an hour
Remove from the oven and place on a wire rack until cool
Meanwhile, make the buttercream by placing the butter in a bowl and sieving over the icing sugar. Then, add the milk and strawberry jam and beat until smooth and light. Add the strawberry flavouring to your preference
Smooth the buttercream over your cake
Enjoy!
Sunday, 14 August 2011
Vanilla Sponge with Nutella Frosting
I adore this cake! Look at it in all of it's glory...
Clearly my life has come down to spending my evenings in bed wondering how I can improve on my Swiss Meringue Buttercream. After the failure of my lemon cupcakes (I'm exaggerating somewhat, they weren't too bad), I was so determined to try again that I felt I owed it to myself to succeed. Yes, my life has become that sad!
I'm pleased to say that it was this time that I succeeded! I followed two recipes from the great Caked Crusader, using her Nutella Cupcake recipe and her Vanilla and Coconut Cake with Sweet Tobacco recipe. An odd choice, I know, but after much discussion my brother and I felt that my cakes were always nicer and ultimately more successful than my cupcakes (should I be offended at that?!). So, I used the Nutella frosting from one and the Vanilla sponge from the other and merged them together, resulting in this...
As per usual with any of The CC's sponges, this cake is unbelievably light, moist and, most importantly, it has the perfect amount of vanilla in it to contrast with the bitter Nutella to create a perfectly rounded cake.
I followed her instructions for the buttercream more thoroughly than previously and had the pan of sugar and eggs over the heat for the full ten minutes. I then put my KitchenAid on speed 2 and, instead of whipping it up into a frenzy in a minute or so, allowed it to cool in it's own time. I feel this benefited the buttercream greatly and it has a fantastic flavour and texture, just as I had hoped for!
Once again, a huge thank you to The Caked Crusader. I have provided the links for the recipes I used individually above, but here are the recipes together as I used them!
Ingredients:
Method:
For the cake:
Preheat the oven to 170°C/fan oven 150°C/325°F/Gas mark 3
Line the bottoms of two 20cm loose bottomed sandwich tins with baking paper.
Cream together the butter and sugar until light and fluffy. Do not skimp on this stage as it’s the key to a lovely sponge
Gradually beat in the eggs, adding a little of the flour if it starts to curdle
Beat in the vanilla extract
Beat in the flour and baking powder
If the batter is too stiff i.e. not dropping consistency, add a dash of milk
Divide the batter evenly between the two prepared tins. Level the surfaces
Bake for approx 30 minutes until a skewer inserted into the cakes comes out clean.
Leave to cool for 10 minutes in the tins before removing from the tins and leaving to cool completely on a wire rack
The sponges can be made the day before and stored in airtight containers
For the Swiss Meringue Buttercream:
Place the egg whites and sugar in a bowl over a pan of simmering water. Stir pretty much constantly to prevent the egg from cooking
After 5-10 minutes, when the sugar has dissolved, remove the bowl from the pan of simmering water and whisk until the meringue has puffed up and the mix is cool
Add the butter and vanilla to the meringue and whisk until the butter has been completely incorporated into the meringue. At first it will look a disaster – it will collapse and look curdled but don’t worry! Stop when the mixture is smooth, light and fluffy
Beat the nutella into the buttercream – add a spoon at a time so you can judge how much nutella the buttercream needs
Clearly my life has come down to spending my evenings in bed wondering how I can improve on my Swiss Meringue Buttercream. After the failure of my lemon cupcakes (I'm exaggerating somewhat, they weren't too bad), I was so determined to try again that I felt I owed it to myself to succeed. Yes, my life has become that sad!
I'm pleased to say that it was this time that I succeeded! I followed two recipes from the great Caked Crusader, using her Nutella Cupcake recipe and her Vanilla and Coconut Cake with Sweet Tobacco recipe. An odd choice, I know, but after much discussion my brother and I felt that my cakes were always nicer and ultimately more successful than my cupcakes (should I be offended at that?!). So, I used the Nutella frosting from one and the Vanilla sponge from the other and merged them together, resulting in this...
As per usual with any of The CC's sponges, this cake is unbelievably light, moist and, most importantly, it has the perfect amount of vanilla in it to contrast with the bitter Nutella to create a perfectly rounded cake.
I followed her instructions for the buttercream more thoroughly than previously and had the pan of sugar and eggs over the heat for the full ten minutes. I then put my KitchenAid on speed 2 and, instead of whipping it up into a frenzy in a minute or so, allowed it to cool in it's own time. I feel this benefited the buttercream greatly and it has a fantastic flavour and texture, just as I had hoped for!
Once again, a huge thank you to The Caked Crusader. I have provided the links for the recipes I used individually above, but here are the recipes together as I used them!
Ingredients:
For the cake:
175g unsalted butter, at room temperature
175g golden caster sugar
2 teaspoons vanilla extract
3 eggs
175g self raising flour
1 teaspoon baking powder
175g unsalted butter, at room temperature
175g golden caster sugar
2 teaspoons vanilla extract
3 eggs
175g self raising flour
1 teaspoon baking powder
For the Swiss meringue buttercream:4 egg whites
250g caster sugar
250g unsalted butter
2 teaspoons vanilla extract
3-4 tablespoons Nutella- I used 4 teaspoons not tablespoons and my buttercream looked aneamic..
250g caster sugar
250g unsalted butter
2 teaspoons vanilla extract
3-4 tablespoons Nutella- I used 4 teaspoons not tablespoons and my buttercream looked aneamic..
Method:
For the cake:
Preheat the oven to 170°C/fan oven 150°C/325°F/Gas mark 3
Line the bottoms of two 20cm loose bottomed sandwich tins with baking paper.
Cream together the butter and sugar until light and fluffy. Do not skimp on this stage as it’s the key to a lovely sponge
Gradually beat in the eggs, adding a little of the flour if it starts to curdle
Beat in the vanilla extract
Beat in the flour and baking powder
If the batter is too stiff i.e. not dropping consistency, add a dash of milk
Divide the batter evenly between the two prepared tins. Level the surfaces
Bake for approx 30 minutes until a skewer inserted into the cakes comes out clean.
Leave to cool for 10 minutes in the tins before removing from the tins and leaving to cool completely on a wire rack
The sponges can be made the day before and stored in airtight containers
For the Swiss Meringue Buttercream:
Place the egg whites and sugar in a bowl over a pan of simmering water. Stir pretty much constantly to prevent the egg from cooking
After 5-10 minutes, when the sugar has dissolved, remove the bowl from the pan of simmering water and whisk until the meringue has puffed up and the mix is cool
Add the butter and vanilla to the meringue and whisk until the butter has been completely incorporated into the meringue. At first it will look a disaster – it will collapse and look curdled but don’t worry! Stop when the mixture is smooth, light and fluffy
Beat the nutella into the buttercream – add a spoon at a time so you can judge how much nutella the buttercream needs
Babka Cake
Here's another fantastic recipe I nabbed from The Caked Crusader!
I was so proud of myself for making not only such an appealing cake but also one that tasted so unexpectedly delicious. According to The Caked Crusader (my new go to for recipes), this is a traditional Polish cake with each family taking on their own version. Wikipedia also tells us that it is a sweet yeast cake, but this recipe has no yeast in it.
Although my cake did not have a consistent strip of chocolate through it's middle as I expected from the pictures the CC gives, it did have the most beautiful swirls and each slice concealed it's own little pattern!
I'm curious to see whether I could substitute real chocolate for the cocoa powder, to give a greater depth of both colour and flavour. I'd also like to try this with my Strawberry Yoghurt Cupcake recipe, I don't see why several sponge mixtures can't be layered in this way!
This cake was incredibly successful, I stayed out the night I made it and awoke to a text from my Dad saying half of it had gone with him to work and I now had another order for one! I should charge...
Thanks to The Caked Crusader for once again giving me such an amazing recipe :)
Ingredients:
225g unsalted butter, at room temperature
275g caster sugar
4 eggs
275g self raising flour
2-4 dessert spoons single cream (start with 2 and add more if the batter is dry)
3 teaspoons cocoa powder
Method:
Heat the oven to 160°C/fan oven 140°C/315°F/Gas mark 2-3.
Line an 18cm loose bottomed tin with baking paper.
Start by beating together the butter and sugar until light and fluffy.
Slowly beat in the eggs and 2 dessertspoons of cream.
Fold in the flour. If the mix feels too dry add 2 more dessertspoons of cream.
Spoon 1/3 of the cake batter into the prepared tin and level the surface. Put to one side.
Spoon half of the remaining cake mix into a dish. Put to one side.
Add the cocoa to the half left in the bowl and stir gently until the batter is a nice even brown.
Spoon the cocoa batter into the tin and level the surface.
Spoon the remaining plain batter into the tin and level the surface.
Bake in the over for approximately 1 hour or until a skewer comes out cleanly. Mine took 1 hour 5 minutes.
Leave to cool completely in the tin, on a wire rack.
Enjoy!
Although my cake did not have a consistent strip of chocolate through it's middle as I expected from the pictures the CC gives, it did have the most beautiful swirls and each slice concealed it's own little pattern!
I'm curious to see whether I could substitute real chocolate for the cocoa powder, to give a greater depth of both colour and flavour. I'd also like to try this with my Strawberry Yoghurt Cupcake recipe, I don't see why several sponge mixtures can't be layered in this way!
This cake was incredibly successful, I stayed out the night I made it and awoke to a text from my Dad saying half of it had gone with him to work and I now had another order for one! I should charge...
Thanks to The Caked Crusader for once again giving me such an amazing recipe :)
Ingredients:
225g unsalted butter, at room temperature
275g caster sugar
4 eggs
275g self raising flour
2-4 dessert spoons single cream (start with 2 and add more if the batter is dry)
3 teaspoons cocoa powder
Method:
Heat the oven to 160°C/fan oven 140°C/315°F/Gas mark 2-3.
Line an 18cm loose bottomed tin with baking paper.
Start by beating together the butter and sugar until light and fluffy.
Slowly beat in the eggs and 2 dessertspoons of cream.
Fold in the flour. If the mix feels too dry add 2 more dessertspoons of cream.
Spoon 1/3 of the cake batter into the prepared tin and level the surface. Put to one side.
Spoon half of the remaining cake mix into a dish. Put to one side.
Add the cocoa to the half left in the bowl and stir gently until the batter is a nice even brown.
Spoon the cocoa batter into the tin and level the surface.
Spoon the remaining plain batter into the tin and level the surface.
Bake in the over for approximately 1 hour or until a skewer comes out cleanly. Mine took 1 hour 5 minutes.
Leave to cool completely in the tin, on a wire rack.
Enjoy!
Lemon Cupcakes and an Introduction to The Caked Crusader!
So, here's the story. Every summer I go to Waterstones before my holidays and invest in more books than I can justify. This year, my books took the theme of baking (who'd have thought it!) and among the others was Meet Me at The Cupcake Cafe by Jenny Colgan. Firstly, this book was truly lovely and I can fully recommend it- warning though, it made me want to open my own cafe, so beware! Secondly, this book introduced me to The Caked Crusader and so the challenge begins as I attempt all of her mouth wateringly fantastic cakes. I can't stress enough how much everyone needs to read her blog and try out her recipes- http://thecakedcrusader.blogspot.com/- go bake!!
Lemon Cupcakes
This was the first of The Caked Crusader's recipes that I tried and also the first time that I had ever made Swiss Meringue Buttercream. I can safely say that I- or if I were cruel enough to drag my brother into this, we- failed miserably in terms of the buttercream!
The cupcakes were moist, with a crunchy layer of lemon syrup over the top of them, a result of brushing the left over lemon juice over the cupcakes as soon as they came out of the oven. I used the same method when making my Lemon Drizzle Cake and knew it was a winning idea as soon as I read the recipe.
Despite the fact that my brother and I were both in agreement with The Caked Crusader in her dislike of having rind in a cake, we decided to continue with the recipe and put the rind in the mixture. This provided great flavour but unfortunately the texture just wasn't right for us and we'll know not to do the same again next time!
Ingredients:
For the cupcake:125g unsalted butter, at room temperature
125g caster sugar
2 eggs
125g self raising flour
Juice and rind of one lemon
Dash of milk, if necessary
For the Swiss meringue buttercream:4 egg whites
250g caster sugar
250g unsalted butter
2 teaspoons lemon extract
Method:
Preheat the oven to 190°C/fan oven 170°C/375°F/Gas mark 5.
Line a muffin pan with 12 paper cases.
Start by making the cupcakes. Beat together the butter and sugar until pale and fluffy.
Add the eggs, flour, lemon rind and half the lemon juice.
If necessary (this will depend on the juiciness of your lemon), add a dash of milk and beat until well combined and smooth. You’re aiming for a nice light, almost dropping consistency batter.
Spoon the mixture evenly into the 12 paper cases.
Bake for approximately 15 minutes or until a skewer comes out clean. Mine took 17 minutes.
Remove from the oven and, straight away, brush the remaining lemon juice over the hot cupcakes.
Leave to cool on a wire rack.
Now make the swiss meringue buttercream. Place the egg whites and sugar in a bowl over a pan of simmering water. Stir pretty much constantly to prevent the egg from cooking.
After 5-10 minutes, when the sugar has dissolved, remove the bowl from the pan of simmering water and whisk until the meringue has puffed up and the mix is cool.
Add the butter and lemon extract to the meringue and whisk until the butter has been completely incorporated into the meringue. At first it will look a disaster – it will collapse and look curdled but don’t worry! Stop when the mixture is smooth, light and fluffy.
Spoon the buttercream into a piping bag and swirl onto each cupcake.
Enjoy!
Lemon Cupcakes
This was the first of The Caked Crusader's recipes that I tried and also the first time that I had ever made Swiss Meringue Buttercream. I can safely say that I- or if I were cruel enough to drag my brother into this, we- failed miserably in terms of the buttercream!
The cupcakes were moist, with a crunchy layer of lemon syrup over the top of them, a result of brushing the left over lemon juice over the cupcakes as soon as they came out of the oven. I used the same method when making my Lemon Drizzle Cake and knew it was a winning idea as soon as I read the recipe.
Despite the fact that my brother and I were both in agreement with The Caked Crusader in her dislike of having rind in a cake, we decided to continue with the recipe and put the rind in the mixture. This provided great flavour but unfortunately the texture just wasn't right for us and we'll know not to do the same again next time!
Unfortunately, as I say, we were unsuccessful in making our Swiss Meringue Buttercream. Our buttercream came out almost like the cream that comes out of a can and had the most undesirable texture. This annoyed me hugely as I knew how lovely the cakes were supposed to be. I eventually asked The Caked Crusader for her help and she suggested that the sugar hadn't dissolved properly and that we were to continue to whisk until the buttercream was smooth and creamy. I think in our haste to have our cupcakes, we skimped on time to allow the sugar to dissolve and were to quick to stop the buttercream from reaching it's potential, leaving us with our disappointing result!
All in all, fabulous cupcakes with a beautiful icing, we just cocked it up somewhat!
Thanks to The Caked Crusader :)
Ingredients:
For the cupcake:125g unsalted butter, at room temperature
125g caster sugar
2 eggs
125g self raising flour
Juice and rind of one lemon
Dash of milk, if necessary
For the Swiss meringue buttercream:4 egg whites
250g caster sugar
250g unsalted butter
2 teaspoons lemon extract
Method:
Preheat the oven to 190°C/fan oven 170°C/375°F/Gas mark 5.
Line a muffin pan with 12 paper cases.
Start by making the cupcakes. Beat together the butter and sugar until pale and fluffy.
Add the eggs, flour, lemon rind and half the lemon juice.
If necessary (this will depend on the juiciness of your lemon), add a dash of milk and beat until well combined and smooth. You’re aiming for a nice light, almost dropping consistency batter.
Spoon the mixture evenly into the 12 paper cases.
Bake for approximately 15 minutes or until a skewer comes out clean. Mine took 17 minutes.
Remove from the oven and, straight away, brush the remaining lemon juice over the hot cupcakes.
Leave to cool on a wire rack.
Now make the swiss meringue buttercream. Place the egg whites and sugar in a bowl over a pan of simmering water. Stir pretty much constantly to prevent the egg from cooking.
After 5-10 minutes, when the sugar has dissolved, remove the bowl from the pan of simmering water and whisk until the meringue has puffed up and the mix is cool.
Add the butter and lemon extract to the meringue and whisk until the butter has been completely incorporated into the meringue. At first it will look a disaster – it will collapse and look curdled but don’t worry! Stop when the mixture is smooth, light and fluffy.
Spoon the buttercream into a piping bag and swirl onto each cupcake.
Enjoy!
Subscribe to:
Posts (Atom)