Friday 16 December 2011

Rocky Road

I have finally finished Uni for Christmas! I now have five weeks of obsessive baking ahead of me, once we get our oven back!

After a week of excessive studying, all I needed was some form of baking to relieve some stress. As I'm mostly limited to my microwave, Rocky Roads seemed the best option! I get the impression that, as long as they have chocolate and biscuits, Rocky Roads can have anything you like in them. Cue the creativity!


Unfortunately, pictures are limited as I made around 20 and most of them went with my dad to work. As my tray is quite small, the recipe gave me 12 decent size squares and a few in some cupcake cases. So, by the time I got up the next morning, all of the good ones had gone, hence the rubbish photos!

Needless to say, they were delicious. I've only ever had a pre-made, packaged rocky road (deprived childhood?) which are soft but these ones were chocolatey, crunchy and gooey, an all round hit!


We also got around to putting up our Christmas tree, Merry Christmas everyone!


Rocky Roads- recipe adapted from Good To Know

Ingredients:

100g unsalted butter
225g plain chocolate, broken into pieces
2tbsp golden syrup
2tbsp cocoa powder
2tbsp caster sugar
100g Maltesers
100g mixed milk and white chocolate chips- I used half choc chips and half fudge chunks
100g mini marshmallows
225g ginger biscuits, broken into pieces- I used digestive biscuits and found this was too many
Icing sugar to dust

Method:

Line a 20cm (8in) square cake tin with baking parchment.

In a small pan, heat the butter, plain chocolate, golden syrup, caster sugar, cocoa powder and stir together with a wooden spoon. Once melted together, leave to cool for 10 mins- This worked brilliantly in my microwave in 10 second bursts, painfully slow but worth it!

In a large bowl, place the Maltesers, milk and white chocolate chip, mini marshmallows, ginger biscuits and bind together with the melted chocolate sauce.
Pour into the lined tin and leave to set in the fridge for a minimum of 2 hrs.
Remove from cake tin and slice into 16 snack-sized rocky road bars- depends on how generous you are!
Dust the rocky road with icing sugar to serve.

Enjoy!

Saturday 10 December 2011

Another Office Bake

Blog posts at the minute are few and far in between, I currently do not have an oven!! This is proving most difficult, especially as I have a long list of christmas bakes up my sleeve. Luckily, I managed to fit in some baking for my brother before the oven was removed and, as a thank you, received some wonderful flowers!


As always, apologies for the useless photos! Anyway, I made a chocolate victoria sponge not too long ago and it went down really well, better than any cake I normally make! So, when my brother asked me to make some cakes for work, I decided to make another sponge.


This time, I put vanilla buttercream in the middle and chocolate around the edges. I was a bit worried that the two buttercreams wouldn't work together as the vanilla one was quite strong so I had a taste (a big spoonful of the two, I can't lie) and they were lovely! I don't think it looked as good as the first time I made it, but apparently it went down really well :)


I also made some chocolate fudge cupcakes with chocolate fudge buttercream. Overkill, maybe, but they were really lovely and the fudge melted into the cake. I used my favourite cupcake recipe and substituted the white chocolate for fudge pieces.


I put them in festively coloured cupcake cases, and topped them with Betty Crocker chocolate fudge buttercream. I know this is cheating, but its just sooo tasty!!


I'm still struggling with my icing, if i do it from the middle outwards, it doesn't cover the whole cake. If I do it from the outside, I don't get a good peak, see what I mean?


They went down a storm, which is all I can ask for, I'll just keep practising!


Chocolate Victoria Sponge- adapted from Mary Berry's Baking Bible


Ingredients

For the sponge:
2 tablespoons cocoa powder
3 tablespoons boiling water
225g softened butter
225g caster sugar
4 large eggs
225g self raising flour
2 level teaspoons baking powder

For the filling and topping: I found this wasn't enough and made separate batches for the filling and topping
50g softened butter
175g sifted icing sugar
1 tablespoon milk


-Preheat the oven to 180C/Fan 160C/Gas 4
-Grease two 20cm sandwich tins and line the base of each with baking parchment
-Mix the cocoa and water in a mixing bowl then leave to cool slightly
-Measure the remaining ingredients into the bowl and beat until thoroughly blended- I've previously found that this method doesn't create a good rise so used the creaming method which worked brilliantly.
-Divide the mixture between the tins and level them out. Bake in the pre-heated oven for about 25 minutes or until well risen. The tops of the cakes should be springy when touched
-Leave to cool in the tins for a while then turn out and leave to cool on a wire rack.
-For the buttercream, beat the butter, icing sugar and milk until smooth- I found more milk and cocoa powder was necessary!
-Once the cake is cool, sandwich the cakes together with the buttercream and spread the rest on top- or cover the sides like I did
Enjoy!

Wednesday 30 November 2011

Giant Cupcake- my first ever birthday cake!

I've recently become bored of being restricted as to what I can bake. As my parents and brother are on diets and my boyfriend is a bit of a picky eater, my creativity is limited. So, when my friend told me she was looking for a cake for her daughter's birthday, I begged her to let me attempt it. We agreed that it would be a large cupcake and the rest really was down to me.

I've never made a birthday cake and making it in a situation where I wouldn't be able taste it scared me a lot! I'm also a complete novice at decorating cakes so I had planned a test bake but I never got round to it. The cake went into the oven looking most promising!


There are a lot of things I wish I had realised beforehand that a practise run would have eliminated. Firstly, I wish I'd cooked it for longer, all the signs were there for a perfectly cooked cake but, once cooled, I began to worry. This then caused me to cut it in half (at a dodgy angle) and fill it with jam and buttercream which all merged together into one slop.

This stressed me out hugely and at one point my mum even suggested I start again!! I ended up walking away and going back to it a while later, in a much less stressed state. After some icing and a bit of decoration, the cake was completely transformed and I think it turned out really well, even if it does have a bit of a pointy tutu going on!


So, not much to report and not a lot of pictures but apparently it went down really well and Jayden absolutely loved it!


Giant Cupcake- adapted from GoodToKnow


Ingredients

For the giant cupcake:
450g softened butter   
450g caster sugar
8 large eggs
450g self-raising flour
4 level tsp baking powder
2 tsp of vanilla
3 tbsp milk
Giant cupcake tin- mine was silicone and I found this incredibly easy to turn out
For the cake covering:
250g white fondant icing
Pink food colouring
Strawberry jam- I used raspberry
For the buttercream:
110g unsalted butter, softened
500g icing sugar
60ml milk, room temperature
1tsp vanilla extract
Pink food colouring

Method:

Set the oven to 180ÂșC and grease the tin using cake release spray or groundnut oil.

Cream the butter and sugar and add the vanilla. Beat for about 5 minutes. Add one egg at a time with a third of the sieved flour and baking powder until it has gone then add the milk and beat slowly until it is mixed in.
Place half of the mixture in each side of the tin to about ¾ full and bake for 50 minutes. Times really depend on your own oven, so start to check the cake at 50 minutes, then every 10 minutes and do not remove from the oven until the cake is springy to the touch. This might take up to 1 hr 15 minutes.
Remove from the oven and let it cool for 20 minutes before tipping out. If the cake has overflowed or has risen too high don’t worry, you can trim this with a bread knife or a cake leveller. It’s easier to do this while it is still in the tin.

Hold the cooling rack tight over the top of the tin and turn them out to cool. Once the cake is totally cool (probably an hour or 2) you can start decorating it.
Colour and roll out the fondant icing to a ¼ of an inch thick. It has to be 25cm in length and 8cm high.
Melt some jam in the microwave and leaving the cake in the upside down position brush over the base of the cake. This helps the fondant stick. Place the fondant around the cake and trim the excess. You can fold a little over the top (which is the bottom) so you have a clean edge. Press your finger round the indentations so you get the shape of the base back. Then turn the cake (not gripping too hard or you will squash it) the right way up.

Beat the butter, icing sugar, milk and vanilla together in a bowl until light and fluffy. Put a third of the buttercream in another bowl and add pink food colouring to it. Reserve this for your buttercream roses. Spread jam on the bottom half of the cupcake, then the icing and sandwich the two pieces together.

Ice the top with the rest of the buttercream in a design that suits you- I didn't pipe the icing as I was too scared, so just spread it on using a palette knife and finished with a patterned edge side scraper

Add any decoration that you fancy- I used Love Hearts, Dolly Mixtures and some raspberry sherbet

Enjoy!

Monday 21 November 2011

Baking for Children in Need

Firstly, my apologies for a lack of posts recently, baking has been put on hold once more for education but I have a multitude of bakes to blog about, so keep your eyes peeled!

As most of you will be aware, it was Children in Need on Friday and my Dad asked me to make something for a sale they were doing in his office. Although Lakeland were selling Pudsey cookie cutters, I felt that they were an unnecessary cost and probably limiting, as they printed the famous bandage onto the biscuit. I did have a teddy bear cutter that I bought from Fenwicks for 60p, which provided a perfect template for a teddy bear biscuit.


I used the same vanilla cookie recipe for these as I did for my Dracula biscuits and was reminded how much I absolutely hate it. It's sticky, hard to work with and, no matter how long it sits in the fridge before and after you cut your shapes, the biscuits ALWAYS spread into one large tray shaped biscuit. As per usual, I had a mad rush to re cut and carefully transfer the biscuits to a wire rack before they firmed up. Nightmare!

I iced an outline around the bear first so that it would remain in that shape, and then filled it in. Sometimes I can be naturally creative but by this point it was late and I was fed up, so a few Pudsey's looked a bit rubbish.


All in all, I feel that they look good, and apparently they were delicious! I also made some cupcakes by adapting a recipe from The Caked Crusader (which seems to be so versatile it's unreal) to be chocolate chip vanilla cupcakes and decorated them using some buttercream that I had left over from a birthday cake I made earlier that week- I'll update soon!


They look great but I'm still practicing my piping skills, any tips would much much appreciated! My dad says all of the cakes went down really well and they made lots of money for Children in Need so my good deed has been done!


Finally, I got a special mention from The Great British Baking Club which made me very happy!

Happy Baking!!

Monday 31 October 2011

Halloween: Pumpkin Cupcakes and Dracula Biscuits

I hold fond memories of Halloween from when I was younger. Each year, my parents would take my brother and I to our respective scout and brownie parties, bob apples, carve pumpkins, the lot! I always dressed as a witch with an obligatory eyebrow pencil mole on my cheek and my mum's lipstick.

This year, I decided to do some Halloween cakes. I had them planned for weeks, I was to have chocolate cupcakes with a wickedly orange coloured swirl of icing. Unfortunately, I decided at the last minute to turn them into pumpkins, which didn't turn out brilliantly. My chocolate icing solidified, causing me to have to use white icing to paint the unconvincingly scary faces on.


As sad as it seems, the failure of these cupcakes played on my mind all week. Eventually, I forced myself to start my Halloween bakes from scratch. I got the idea of Dracula cupcakes from the Wilton website and used my regular Vanilla Cookie recipe.


I am really proud of myself with these, they taste and look great. They could even be a bit spooky!


Happy Halloween!!

Monday 17 October 2011

Viennese Whirls

Viennese Whirls or Melting Moments? Hmmm...

These biscuits are an amalgamation of a few recipes, the main one being vanilla butter biscuits from The Caked Crusader, as always! I'd like to point out here that I do own recipe books, you've just got to stick to what you know, right?


I really struggled to pipe these into a delicate whirl as I had hoped too but I gradually got the hang of it and I'm pretty pleased with the results! At first, I panicked over the small amount of dough that the recipe made and I made them quite small but they spread out to a perfect size whilst cooking, and kept their shape too!


For the filling, I used Hartley's seedless raspberry jam (nobody likes seeds in their teeth!) and a vanilla butter cream from a recipe by SilverSpoon. I added my vanilla gradually, though, and to my own taste as I worried a full tablespoon of vanilla would be too much.


I made the mistake of stirring the jam in order to make it smoother and it was too runny, this only added to the look though, at least according to my boyfriend! Keep 'em sweet and all that...


Tada! They taste amazing :)


Recipe adapted from The CC and SilverSpoon

Ingredients:

For the biscuits:

115g unsalted butter, at room temperature
3 tablespoons icing sugar
150g plain flour
2 teaspoons vanilla extract

For the filling:

100g Butter (softened)
200g Icing Sugar (sieved)
1 tbsp Milk
1 tbsp vanilla extract
Any jam of your choice

Method:
Preheat the oven to 180°C/fan oven 160°C/350°F/Gas mark 4
Line two baking trays with baking paper- I used a large baking sheet
Beat the butter and sugar until light and fluffy- this will take a few minutes so don’t skimp!
Beat in the flour and vanilla and mix until you have a dough
Fill a piping bag and pipe swirls onto the lined baking trays, they can also be piped into fingers
Sprinkle some sugar over the biscuits, making sure that some settles into the grooves
Bake for 15-20 minutes or until the biscuits are golden brown- mine took 18 or so minutes
Leave to cool on the baking sheet for 10 minutes before moving onto a wire rack to cool completely to allow them to harden up
Meanwhile, make the butter cream. In a large bowl beat the butter with a wooden spoon or an electric whisk until light and fluffy
Gradually mix in the icing sugar until smooth and creamy
Add the vanilla and sufficient milk to give a fairly firm spreading consistency
Choose two biscuits that roughly match each other in size, spread jam on one half and pipe butter cream onto the other
Sandwich the two together and press gently- mine needed setting in the fridge for a while
Enjoy!

Wednesday 12 October 2011

Happy Birthday Pa!

Today is my daddy's birthday :) I love my dad, he is beyond amazing and he deserves nice cake! Although he's a dedicated dieter these days, I asked him if I could make him a birthday cake and he said 'no thanks, but I'd like some for the office please', (an example of how generous he is!) and stated it needed to be chocolate fudge cake. Lovely, I thought, I'll make my famous Death By Chocolate cake. Stupidly, I forgot to add the butter to this cake and the results aren't even worth documenting!

Note to self: never bake when ill!

After getting a tad too annoyed, I frantically hopped on the computer and paid a visit to The Caked Crusader who, in true superhero style, saved me from a very sticky situation.


I chose this recipe for a few reasons; it used all of the ingredients I had without needing to go to the shops, it was easily doubled and they looked delicious!

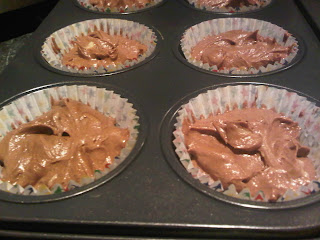
As you can see, the batter for these cupcakes was deliciously smooth, even though it used cocoa powder as opposed to chocolate.


For once, all of my cupcakes came out evenly, and a great size, I love this recipe!


I cheated a little and used Betty Crocker's Chocolate Fudge icing but this was because it is truly beautiful and it topped off a great bake in a great way! I still need a bit of work on my icing skills, I would have liked the icing all over the cake!

All in all, a very nice bake, a very happy office and a very happy daddy! Thanks CC!


Recipe from The Caked Crusader, you can find it here in it's original form

Ingredients

These quantities will make 12 cupcake sponges – the mix doubles up easily should you wish to make 24

125g unsalted butter, at room temperature
125g caster sugar
2 eggs
100g self raising flour
3 tablespoons cocoa powder
2 tablespoon milk
50g white chocolate chips- I didn't put any in as I had none


Method:

Preheat the oven to 190°C/fan oven 170°C/375°F/Gas mark 5. Line a cupcake pan with paper cases
Beat together the butter and sugar until light and fluffy then beat in the eggs, flour, cocoa and milk
When the mixture is smooth and well combined, stir in the chocolate chips
Spoon the batter into the paper cases
Bake for 12-15 minutes or until a skewer inserted into the cupcakes comes out clean. Mine took around 17 minutes, which didn't burn them!
Remove from the tin as soon as possible and leave to cool on a wire rack – removing from the tin is important as the heat of the tin will mean that the cupcakes continue to cook
Pipe or spread your chosen icing over the chocolate cupcakes and decorate as you please
Enjoy!

Monday 3 October 2011

Malteser Fridge Cake :)

Chocolate Fridge Cake used to be my favourite thing to make when I was younger, it was forever a hit among my brownie group! Unfortunately, the recipe was from a book my Dad got me and was lost years ago and as a result, I have forever hunted for a replacement!

I'd like to thank My Dish for helping me rediscover my love for the first thing I ever successfully baked, if you class it as baking...


Warning: these cost next to nothing to make (providing you have the staples in the cupboard like I tend to!) and are mega mega delicious, not a good idea for those attempting a diet!

Malteser Fridge Cake- from My Dish

Ingredients:

100g margarine, softened- I used unsalted butter as it was in the cupboard
6 tablespoons golden syrup
250g cooking chocolate (milk)- I used Sainsbury's 27p choc, doesn't alter the taste as you'd expect!
200g digestive biscuits, roughly crushed- I used Morrison's own
200g Maltesers, cut roughly in half- I used 135g as this bag was cheaper...

Method:

Melt margarine, syrup and chocolate over heat (or in the microwave stirring often)
When it's all melted, take it off the heat and add the crushed biscuits and maltesers, mix well
Spread into a lined greased swiss roll tin
Chill in the fridge then cut up into small squares
Keep refrigerated, can also be frozen!
Enjoy!

Sunday 2 October 2011

Macmillan Coffee Morning: Cakes and Bakes

A while back, I was asked by a friend to make some cakes for a bake sale her Grandma was holding as part of Macmillan's World's Biggest Coffee Morning. This scared me as the circumstances in which I normally make cakes never call for them to be particularly outstanding...

After much deliberation, I settled on a Coffee and Walnut cake, a Madeira and some Lemon Biscuits, all of which I have made before without much difficulty.


This is a picture from the first time I attempted Lemon Biscuits. These were left circular and un-iced as my family tend to prefer bakes without icing. As the biscuits for the bake sale needed to be extra special, I used a circular star type cutter and decorated them with lemon icing.


In order for the icing to remain on the biscuit and not dribble over the sides, I piped icing around the edges and allowed it to dry completely before adding the rest of the icing.


I was seriously impressed that I'd come up with this idea, it worked spectacularly. I finished them off with some citrus sprinkles by Dr. Oetker.

Next, I made a Madeira Cake. I've made this cake hundreds of times without any problems so it was really just typical that this turned out poorly when it really mattered! As I have just purchased Mary Berry's Baking Bible, I decided to follow the Madeira recipe in it.

My regular recipe is from the original GBBO book and I felt this would also be a great bake. The recipe told me to throw everything into the bowl and mix, which I was uneasy with. The cake came out unrisen and a bit flat which I believe was due to the lack of method behind the recipe.


I therefore had to smother the cake in a lemon icing in order for it to look less rubbish. On the day, my Granddad bought the cake so disaster averted!!

And, for my 'Show Stopper'...


This cake was received in the best way I could have possibly imagined it to have been, I was so proud! Having made this cake previously, I knew that the sponges came out thin in the tins I was planning to make them in and therefore doubled the mixture. The cake was, quite frankly, colossal in size, and apparently was selling for £1 a slice!

Not necessarily a full house of successful bakes but it was all in aid of a charity very very close to my heart. I only hope the efforts of myself and my fellow bakers have helped Macmillan in all of the amazing work they do!

Coffee and Walnut cake from The Great British Book of Baking, Madeira Cake from Mary Berry's Baking Bible and Lemon Biscuits from Great British Bake Off: How to Bake: The Perfect Victoria Sponge and Other Baking Secrets

Thursday 29 September 2011

Homemade Tomato Chutney

Firstly, my apologies as this is apparently my first blog in 2 weeks! I recently started university (waaah, so scary!) and with freshers, inductions, lectures etc., my life has become unbelievably hectic! I do, however, have a lot of bakes coming up, so keep your eyes peeled!

Somehow, I actually managed to have an afternoon to myself last Sunday and, seeing as my brother had suggested I made some chutney, I though I'd man up and give it a go!


Firstly, we had to sterilise the jar which, according to the instructions, needed to be immersed in water and have at least 3cm above it. This proved difficult as our largest pan had cauliflower in it (see above photo!) and we therefore had to use a pressure cooker. This was a laborious task but it allowed me to do all the prep needed.


Adding the red wine vinegar really made me excited about the chutney, it smelt beautiful! There was absolutely nothing difficult about this recipe, we literally threw everything into the pan and watched it simmer.


Despite the long wait, it eventually broke down and produced a lovely chutney which tasted more oniony than tomatoey but is delicious nonetheless!


Apologies for the poor photo, it had been eaten by the time I got to take a photo and it was dark!


Homemade Tomato Chutney- from the BBC Good Food website

Ingredients:

500g red onions , finely sliced
1kg tomato , chopped
4 garlic cloves , sliced
1 red chilli , chopped (optional)- we used half a green chilli as it was all we had
4 cm piece ginger , peeled and chopped- we didn't use this, no one but my mum likes it!
250g brown sugar
150ml red wine vinegar
5 cardamom seeds- again, we skipped these
½ tsp paprika 

 Method:

Tip all the ingredients into a large heavy-based pan and bring to a gentle simmer, stirring frequently
Simmer for 1 hr, then bring to a gentle boil so that the mixture turns dark, jammy and shiny
Place into sterilised jars and allow to cool before covering
Will keep for 6 weeks
Enjoy!

Thursday 15 September 2011

My New Baking Buys!

My whole family have now clocked onto the obsession I have with baking and all that comes with it. This, apparently, is not a bad thing as I get presents like this...


As a thank you for babysitting over the summer, my aunt bought me these as a way of encouraging me further into attempting decorating cakes. Here, I have an icing turntable, a rolling pin, a modelling tool, some flower cutters, a 'decorating triangle' and a book on how to use these mind baffling tools. I was hugely touched that so much thought had gone into these and was immediately compelled to go buy icing and bake cake. I chickened out, of course...


Alongside this, my OH's mum bought me this book following a conversation about how I learnt to bake at the side of my grandma who always had her trusty BeRo at hand. All of the recipes that I remember are in there; Maids of Honour, Viennese Fingers, the lot!


I've also made a few of my own buys recently, all of which kept Lakeland in business! I bought icing to go with my new presents, a new piping set to replace the rubbish excuse for a piping bag I currently have and I also bought a new cookie cutter which the woman forgot to take out of the basket and scan, hmmm....

Lakeland currently have a buy one, get one half price offer going on and I bought a new baking sheet that gratefully isn't silicone and a cake ring which is effectively a bundt tin! My brother also bought me an icing spatula so I am one very happy girly!

Monday 12 September 2011

Help! My Scones Won't Rise

First of all, I'd like to say thanks to my brother, who wrote my first ever guest blog! His photos were amazing and from here on, he will be taking photos for my blog when he can!

On a sadder note, I made a batch of scones today that, once again, didn't rise! I've tried everything from cutting them smaller/bigger/thicker, Delia to BBC Good Food, adding more/less cheese, the lot!


Here, I used the recipe from the BBC Good Food channel and I followed the recipe word for word and yet mine look nothing like theirs do! I did get 20 out of a recipe for 8-12 but this surely cannot be the reason as mine were cut out at 2cm thick like instructed!


Someone PLEASE help me?!

Friday 9 September 2011

Guest Blogger: Baking Bread with Brother


There's something that has always fascinated me about bread - the fact that a few simple ingredients can be combined together to become one of the tastiest, most comforting and popular foods in the world is in no small part why bread is a true food icon.
Unfortunately, bread that you buy is often far from the ideal loaf. Full of preservatives, often flavourless and stodgy - it’s a wonder why people don’t just bake their own.

As a direct result of the success of Ray's Sundried Tomato Bread from a few weeks ago, I have been inspired to get my hands dirty and bake some of my own bread - as such, Ray asked me to write this guest blog spot to chart my success.

So today I am making two loaves - a classic white bread loaf, and a second sundried tomato loaf. Unlike the last sundried tomato loaf however, which was baked according to a modified recipe for sundried tomato bread rolls from the Great British Book of Baking - this time I would be using a classic white loaf recipe from the BBC Good Food website, and into one of the sets of ingredients be adding a good handful of chopped sundried tomatoes. Now, it is fair to say that despite having been making bread for similar amounts of time, my sister is the better baker out of the two of us. It wasn’t until after following through with this risky bread baking method that I learnt adding extra ingredients to a standard bread recipe can drastically alter the consistency, texture and composition of your final loaf, unless preventative measures are taken. However, as luck would have it, there were no bread-based culinary disasters to report.

Adding extra ingredients may be tasty, but can also ruin your loaf if you aren't careful!

 I'm sure I am not the only one who finds baking bread a great stress reliever - not only is kneading a great way to vent some steam, but at the end of the day you have a delicious, warm, freshly baked loaf to look forward to. 
However, with much excitement on my behalf, and under strict instructions not to break it, Ray allowed me to use her beloved Kitchenaid to mix and knead the dough for our two loaves. While using a Kitchenaid with the bread dough attachment may not be as effective at stress relief as kneading by hand, it is certainly quicker, less tiring and generally more fun - especially when baking two separate loaves!
After around ten minutes at "Speed setting two! Nothing more, nothing less!" the bread dough was smooth and elastic, the equivalent of a good twenty minutes or more of hand kneading.

Smooth and elastic, in only half the time!

 From this point on, I was back in classic bread making territory - place the well kneaded bread dough into an oiled container and cover. Place in a warm area (a difficult thing to find in our house!), and allow the dough to double in size - usually around an hour's time.
Once your mixture has grown, it’s time to 'knock back' the dough - essentially, this process undoes all the work that the yeast has done in the last hour, causing the dough to grow. To knock back the bread, lightly flour a clean and dry surface, and begin pushing out the pockets of air that have grown within the dough. While you may feel the last hour of waiting has gone to waste, it is a vital process in getting that perfect loaf texture! Be sure to get all of the air pockets out, otherwise when your bread bakes you will have large holes within the body of bread itself - not so good when you want to slice your loaf and put butter on it!

Looking good so far.

 Once you are satisfied your dough is knocked-back enough, unfortunately it is time to play the waiting game again. Once you have grabbed your loaf tins, and have greased them, shape the dough into rugby balls and place it into your tins. Stick on your oven, but don’t be too hasty to put the bread in just yet - it needs to prove first. To me this is the worst part about making bread - you are so close to that delicious, warm smell of freshly baked bread - and yet you have to hide your bread away for another half an hour before you can even think about putting it in the oven, Just as well really, as our oven takes a life-time to warm up!

Not long to go now, but it feels like an age!

 Once the bread has proved for the final time, after around thirty minutes - it is finally time to bake! This is, without doubt the best part, other than the eating of your loaf of course! The smell fills the house, and I have to admit, a certain feeling of pride is not uncommon at this point - even if you bake bread every single day, each loaf is always a special thing!

What you have been waiting for!

 When your loaf is cooked allow it to cool and enjoy, you deserve it!


Jonny

Monday 5 September 2011

A Day at the Beach: Cheesecake Brownies and Choc Chip Cookies

Let me set the scene...


The above photo is of a row of beach huts in Blyth, a small coastal town in Northumberland. The hut on the far right, fondly known as Lobster, was ours for the day and my full family gathered our deck chairs and picnics and spent the day by the beach. I love an excuse to bake, especially as cake is never fully appreciated in a diet laden household like mine so I jumped at this opportunity.

I've had a Betty Crocker Chocolate Chip Cookie mix sitting in my cupboard for ages and knew this was a good time to get rid of it. I did a great job at pretending these were my own recipe and I'm ashamed to say that these went down better than any of my homebakes ever do!


I also chose to make Cheesecake Brownies from The Ultimate Philadelphia Cookbook. Although I like the idea of this book, I feel some of the recipes were put together without any regard as to whether the cream cheese works as an element and it certainly didn't in this recipe.

It's very rare that I don't get to use my mixer when baking but the brownies were made completely in a pan, alike the jumbles I made previously.


The recipe told you to swirl the cheesecake mix on top of the brownie batter but I found that this was inconsistent and some brownies had loads of cheesecake and others none at all. I know it may ruin the idea of the recipe but I feel the cheesecake and the brownie should have been one batter.


Normally, I would never bake two things that have different temperatures and cooking times together at once but, as there were only ten degrees between each and I was short for time, I took the plunge and there were no negative consequences, luckily!


As these were a rushed bake, I had to cut these when they were still warm and they crumbled quite badly as a result. I also found they cooked before the 35-40 minutes and I had burnt edges, so they're definitely a bake to keep your eye on!


The majority of my eatership agreed that, while the brownie was really good, the 'cheesecake' bit was too over powering and was, at times, an unwelcome contrast to the chocolate brownie (my words not theirs!).
In my opinion, Philadelphia has quite a sour flavour and, should I make these again, I'd avoid using it completely. Marscarpone cheese would also work really well as a substitute.


All ready to head off to the beach!


Just to finish, my beautiful cousin Olivia who saw that her brother was on my blog and she wanted to be aswell!


Cheesecake Brownies- adapted from The Ultimate Philadelphia Cookbook

Ingredients:

125g butter- it wasn't specified but I used unsalted
125g dark chocolate, chopped
200g dark muscovado sugar
3 eggs, lightly beaten
50g plain flour, sifted
50g cocoa powder
1/4 tsp baking powder
200g Philadelphia Light- I used regular which may have affected the taste
50g caster sugar- I suggest more than this!

Method:

-Preheat the oven to 180C/gas 4 and grease and line a rectangular cake tin or a tray bake pan
-Mix the chocolate, butter and muscovado sugar in a saucepan and stir over a medium heat until the mixture has melted.
-Remove from the heat and whisk in the eggs after allowing it to cool for a few minutes
-Sift in the flour, cocoa and baking powder and mix until combined.
-Spoon into the prepared tin and level off
-Beat in the Philadelphia and caster sugar until smooth and creamy then spoon randomly over the chocolate mixture and swirl with the tip of a knife
-Bake for 35-40 minutes or until cooked through
-Allow to cool before slicing- otherwise it goes all mushy like mine did!
Enjoy!
Related Posts Plugin for WordPress, Blogger...