Tuesday 30 August 2011

Sundried Tomato Loaf


One of my favourite things to bake is bread. I even used to enjoy the exhausting task of kneading before I bought my mixer. When my parents joined up with Slimming World and my brother moved out for university, baking bread became pointless as I was the only one who ate it. So, as sad as it may seem, I was overjoyed when my mum suggested I made some bread!

As my parents had brought a bag of sun dried tomatoes home with them from Nice, and I had a recipe for something similar in one of my books, this seemed a natural decision. Unfortunately, I hate sun dried tomatoes and, despite waiting forever to be able to bake bread, everyone but me got to eat it!


Apologies to those who have noticed that these pictures were not taken in my kitchen, it was a freezing cold day in Newcastle and somebody had left the back door open which made the kitchen almost arctic like and most certainly not 'room temperature'. As you can see, my living room provided a perfect breeding ground for the yeast!

The original recipe for this was from The Great British Book of Baking (surprise, surprise) and was for individual Thyme and Sun dried Tomato Rolls. I had no thyme, however, and I feel loaves are always best as there's more to share around!


As a result, this loaf was very small but it cooked in the same time as the rolls would have done. I've tasted the bits without tomatoes and it's very nice!!


Ingredients:

350g strong white bread flour
1 teaspoon caster sugar
1 teaspoon salt
1 x 7g sachet of easy blend/easy bake dried yeast
4 tablespoons olive oil- I used vegetable as I had none and it made no difference
200ml lukewarm water
2 teaspoons fresh thyme leaves, chopped
6 sun dried tomato halves, chopped and drained of oil- I used 6 full tomatoes as I wasn't using thyme

Method:


-Grease a small loaf tray- if making buns, grease a large baking tray

Combine the flour, sugar, salt and yeast in a mixing bowl or the bowl of a food mixer

-Add the oil and work in enough lukewarm water to make a soft but sticky dough

-Knead until pliable and smooth- this could take around 10 minutes by hand and 5 in a stand mixer. Add the thyme and sundried tomatoes and knead until combined, then cover with cling film until doubled in size- according to the book this should take around an hour at room temperature

-Punch down the dough once risen and turn onto a floured surface. Knead for a few seconds and shape into a rugby ball- if making buns, separate into 9 pieces

-Cover the tray with cling film or a dry towel and leave to double in size- around twenty minutes

-Heat your oven to 190C/375F/Gas 5. Once risen, cook the dough for 15-20 minutes or until golden brown- this time works for the loaf and the buns

-Leave to cool on a wire rack

Enjoy!

Saturday 27 August 2011

Cake in a Cake


I came across this idea on Bake it in a Cake and was immediately desperate to give it a go. Unfortunately, the website was undergoing construction and there were no recipes regarding how to make this cake. Alongside this, they had made cupcake versions and I wanted to make a full cake.

I googled the idea and came across a version on Butter Hearts Sugar. This recipe was for a loaf cake which was what I was looking for but it used heart shaped cutters that I didn't have. This was the only website which clearly explained the steps in making such a creation, go have a look!

Due to no recipes, no heart shaped cutters and generally no idea whatsoever, this cake became completely about compromise which unfortunately became it's downfall.


I followed a Vanilla Sponge recipe from The Caked Crusader and then adapted it to fit the instructions from Butter Hearts Sugar by splitting 1/3 of the batter and colouring it red. At this point I became confused, the sponge recipe was to be cooked for over an hour but once splitting the batter, I had to cook the red sponge for 20 minutes. Aswell as this, one recipe said 180 degrees and one 160 which I set my oven to. After about 16 minutes, the cake was browning and a skewer came out clean.


Although all of the signs were correct, the cake smelt eggy and to me, that means undercooked. I figured this would be ok as it was going back in the oven and continued...


I used my cutters and got as many as I could from the sponge, which turned out to be just enough for my small loaf pan. I then layered half of the original batter into the pan and started to assemble the circles


I then layered the remaining batter over the top and the secret was concealed!


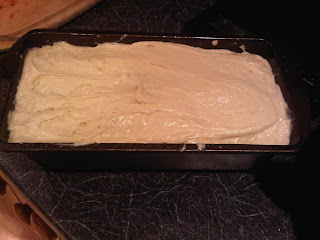
This went in the oven and, although the recipe said 1 hour 20 minutes, this was for a round sponge and my loaf tin was rather small. After about an hour, a skewer was coming out clean.


The sponge recipe from The CC came with a syrup and a buttercream but I chose not to use these as the amount of buttercream was too much to cover such a small cake and, as it was nearing midnight, I really couldn't be bothered to make the syrup (sorry!).


Having gone to bed with an unfrosted cake (not literally), I decided it needed a bit of buttercream as when I cut into the cake, it was incredibly dry. This may well have been because I chose to ignore the use of the syrup but I genuinely believe it was the fact that some of the cake is baked twice. The white (and cooked once) sponge is tasty but the red sponge is dry and tastes peculiar, obviously not helped by being cooked twice, once undercooked.

I whipped up a buttercream (also from The CC), but put in some strawberry jam to match the reddish theme. This provided a good colour but little flavour. I figured the cake had been so much about compromise that a little more wouldn't hurt and I added 1/4 teaspoon of Strawberry flavouring.

The cake is also too crumbly to cut!


With thanks to Bake it in a Cake, The Caked Crusader and Butter Hearts Sugar for all of their recipes and my complete apologies for ruining what could have been an awesome cake!!

I have provided a link to all of the full recipes above but have written the recipe below in the way that I used them.

Post Blog Update: I allowed the cake and buttercream to do their thing in the fridge over night and the buttercream has matured somewhat into a more delicate flavour. The cake has also moistened completely and has an all round better flavour. Upon reflection, I really like this cake!!

Ingredients:

For the cake:
250g unsalted butter- room temperature
250g golden caster sugar- I used half regular and half golden as I had run out of golden
1 teaspoon vanilla extract
Seeds scraped from 1 vanilla pod- I substituted these with another teaspoon of vanilla extract
5 eggs
85g plain flour
100g full fat Greek yoghurt
250g self raising flour
3 tablespoons milk- I used semi skimmed

A few drops of red food colouring

For the buttercream:
80g unsalted butter- room temperature
200g icing sugar
1-2 tablespoons of milk- I used two
Strawberry jam- I used 3, unseeded is best
A few drops of strawberry flavouring- I found 1/4 teaspoon was far too much

Method:


Preheat the oven to 160˚C/fan oven 140˚C/320˚F/Gas mark 3
Lightly grease a 8 inch square cake tin and a loaf tin
Place the butter, sugar and vanilla together in a bowl and beat until they are light and fluffy; you will also see the colour changing to a pale cream. Don’t skimp on this stage as it’s important to get lots of air into the mix
Beat in the eggs, one at a time. If the mix starts to curdle spoon in some of the plain flour
Beat in the yoghurt
Fold in both flours using a metal spoon; this gives you a better cutting edge than a wooden spoon. I just continued with my KitchenAid flat beater
Fold in the milk
Put 1/3 of the mixture into a separate bowl and colour with red food colouring. I went all out here and used quite a few drops!
Spread the red cake mix into the square cake tin and bake for about 20 minutes or until it springs back when poked in the centre
Allow the red cake to half cool in the pan before turning it out onto a wire rack to cool completely. Once the cake is cold cut out your chosen shape using a cookie cutter
Pour half of the remaining cake mixture into the loaf cake tin and smooth out. Press the hearts cutouts in a upright line down the middle of the pan
Pour over the rest of the cake mix and smooth the surface
Place in the oven for 1 hour and 20 minutes or until a skewer comes out clean- mine took an hour
Remove from the oven and place on a wire rack until cool
Meanwhile, make the buttercream by placing the butter in a bowl and sieving over the icing sugar. Then, add the milk and strawberry jam and beat until smooth and light. Add the strawberry flavouring to your preference
Smooth the buttercream over your cake
Enjoy!

Friday 26 August 2011

Toy Story Cupcakes


My little cousin recently broke his collar bone and my brother and I happily obliged to becoming chief babysitters- well sort of! Due to weather and Louie having to wear a sling, we spent too many days cooped up in the house watching Ben10 and I decided we needed to do something different.

Having presumed that measuring out all of the individual ingredients for cupcakes would be rather difficult with a 4 year old, I purchased a Toy Story cupcake set.


Louie happily helped mix the batter and was more than happy to lick the spoon once we had decorated them!

All in all, I was very impressed with these even though they were from a packet. They were light and fluffy and rose nicely despite having a worryingly runny batter! The packet of icing also provided ample for all of the cakes and some left over for Lou...


Yum!

Tuesday 23 August 2011

Cranberry and White Chocolate Jumbles


I hate to bore but I have quite a lot to say about these biscuits; some good, some bad and some completely my fault...

I originally planned on putting pecans and milk chocolate in these but the prices of pecans in my local supermarket were completely unjustifiable. For some reason, I cannot abide the taste of cranberry juice and was therefore dubious about white chocolate and cranberry jumbles, which were a suggestion by my brother. I had no reason to worry though as the cranberries remained juicy despite being cooked within an inch of their life and tasted nothing like cranberry juice!

I loved this recipe as, after melting the butter, everything was literally 'jumbled' together in the pan and scooped onto baking trays. This also gave me the opportunity to use the beast of a saucepan that my brother brought home from uni, it's pretty impressive! I'm yet to fathom why he spent £40 on a pan with no lid...

I did have an issue with this, however, as the chocolate began to melt before it entered the oven and, whether this is a coincident or not, there were no lumps of chocolate in the biscuits and therefore nothing to prove that they had any chocolate in them at all...


As you can see, half of my jumbles are on a tray and half on a baking sheet. Having bought a silicone baking sheet a few months back, this was the first opportunity I had to use it. Unless I'm missing something and using it wrong, this is a rubbish invention. The whole oven rack had to come out, to lay the tray on, spoon the biscuits on and put the rack back in the oven, which resulted in a loss of heat.

Although the recipe stated that the baking trays must be greased, my silicone mat was 'non stick' and I took the plunge to put them in without greasing. As you can see, those on the left from the mat are not cooked underneath and those on the right which had sufficient greasing are perfectly crisp. This made little difference but I'm not bringing myself to chuck the useless thing out!


Ingredients:
(adapted from The Great British Book of Baking)

125g unsalted butter
100g caster sugar
50g light muscovado sugar- I used light demerara
1 medium egg
1/2 teaspoon vanilla extract
175g plain flour
1/2 teaspoon baking powder
Flavourings: up to 100g of each- I did 55g white chocolate and 45g cranberries
2 baking trays well greased with butter

Method:

-Preheat the oven to 190C/375F/gas 5
-In a pan large enough to hold the mixture, melt the butter gently then remove from the heat and stir in both sugars
-Beat the vanilla and egg in a separate bowl and then stir into the butter and sugar
-Sift in the flour and baking powder, once combined, add your choice of flavourings
-Scoop the mixture well apart on greased baking trays- they really spread!
-Bake in the oven for 10-12 minutes or until lightly golden and just firm
-Leave to cool on the trays for a few minutes then allow to cool on a wire rack
Enjoy!

Sunday 14 August 2011

Vanilla Sponge with Nutella Frosting

I adore this cake! Look at it in all of it's glory...


Clearly my life has come down to spending my evenings in bed wondering how I can improve on my Swiss Meringue Buttercream. After the failure of my lemon cupcakes (I'm exaggerating somewhat, they weren't too bad), I was so determined to try again that I felt I owed it to myself to succeed. Yes, my life has become that sad!

I'm pleased to say that it was this time that I succeeded! I followed two recipes from the great Caked Crusader, using her Nutella Cupcake recipe and her Vanilla and Coconut Cake with Sweet Tobacco recipe. An odd choice, I know, but after much discussion my brother and I felt that my cakes were always nicer and ultimately more successful than my cupcakes (should I be offended at that?!). So, I used the Nutella frosting from one and the Vanilla sponge from the other and merged them together, resulting in this...


As per usual with any of The CC's sponges, this cake is unbelievably light, moist and, most importantly, it has the perfect amount of vanilla in it to contrast with the bitter Nutella to create a perfectly rounded cake.

I followed her instructions for the buttercream more thoroughly than previously and had the pan of sugar and eggs over the heat for the full ten minutes. I then put my KitchenAid on speed 2 and, instead of whipping it up into a frenzy in a minute or so, allowed it to cool in it's own time. I feel this benefited the buttercream greatly and it has a fantastic flavour and texture, just as I had hoped for!


Once again, a huge thank you to The Caked Crusader. I have provided the links for the recipes I used individually above, but here are the recipes together as I used them!


Ingredients:

For the cake:
175g unsalted butter, at room temperature
175g golden caster sugar
2 teaspoons vanilla extract
3 eggs
175g self raising flour
1 teaspoon baking powder

For the Swiss meringue buttercream:4 egg whites
250g caster sugar
250g unsalted butter
2 teaspoons vanilla extract
3-4 tablespoons Nutella- I used 4 teaspoons not tablespoons and my buttercream looked aneamic..


Method:

For the cake:

Preheat the oven to 170°C/fan oven 150°C/325°F/Gas mark 3
Line the bottoms of two 20cm loose bottomed sandwich tins with baking paper.
Cream together the butter and sugar until light and fluffy. Do not skimp on this stage as it’s the key to a lovely sponge
Gradually beat in the eggs, adding a little of the flour if it starts to curdle
Beat in the vanilla extract
Beat in the flour and baking powder
If the batter is too stiff i.e. not dropping consistency, add a dash of milk
Divide the batter evenly between the two prepared tins. Level the surfaces
Bake for approx 30 minutes until a skewer inserted into the cakes comes out clean.
Leave to cool for 10 minutes in the tins before removing from the tins and leaving to cool completely on a wire rack
The sponges can be made the day before and stored in airtight containers

For the Swiss Meringue Buttercream:

Place the egg whites and sugar in a bowl over a pan of simmering water. Stir pretty much constantly to prevent the egg from cooking
After 5-10 minutes, when the sugar has dissolved, remove the bowl from the pan of simmering water and whisk until the meringue has puffed up and the mix is cool
Add the butter and vanilla to the meringue and whisk until the butter has been completely incorporated into the meringue. At first it will look a disaster – it will collapse and look curdled but don’t worry! Stop when the mixture is smooth, light and fluffy
Beat the nutella into the buttercream – add a spoon at a time so you can judge how much nutella the buttercream needs

Babka Cake

Here's another fantastic recipe I nabbed from The Caked Crusader!


I was so proud of myself for making not only such an appealing cake but also one that tasted so unexpectedly delicious. According to The Caked Crusader (my new go to for recipes), this is a traditional Polish cake with each family taking on their own version. Wikipedia also tells us that it is a sweet yeast cake, but this recipe has no yeast in it.

Although my cake did not have a consistent strip of chocolate through it's middle as I expected from the pictures the CC gives, it did have the most beautiful swirls and each slice concealed it's own little pattern!


I'm curious to see whether I could substitute real chocolate for the cocoa powder, to give a greater depth of both colour and flavour. I'd also like to try this with my Strawberry Yoghurt Cupcake recipe, I don't see why several sponge mixtures can't be layered in this way!

This cake was incredibly successful, I stayed out the night I made it and awoke to a text from my Dad saying half of it had gone with him to work and I now had another order for one! I should charge...

Thanks to The Caked Crusader for once again giving me such an amazing recipe :)


Ingredients:

225g unsalted butter, at room temperature
275g caster sugar
4 eggs
275g self raising flour
2-4 dessert spoons single cream (start with 2 and add more if the batter is dry)
3 teaspoons cocoa powder

Method:
Heat the oven to 160°C/fan oven 140°C/315°F/Gas mark 2-3.
Line an 18cm loose bottomed tin with baking paper.
Start by beating together the butter and sugar until light and fluffy.
Slowly beat in the eggs and 2 dessertspoons of cream.
Fold in the flour. If the mix feels too dry add 2 more dessertspoons of cream.
Spoon 1/3 of the cake batter into the prepared tin and level the surface. Put to one side.
Spoon half of the remaining cake mix into a dish. Put to one side.
Add the cocoa to the half left in the bowl and stir gently until the batter is a nice even brown.
Spoon the cocoa batter into the tin and level the surface.
Spoon the remaining plain batter into the tin and level the surface.
Bake in the over for approximately 1 hour or until a skewer comes out cleanly. Mine took 1 hour 5 minutes.
Leave to cool completely in the tin, on a wire rack.
Enjoy!

Lemon Cupcakes and an Introduction to The Caked Crusader!

So, here's the story. Every summer I go to Waterstones before my holidays and invest in more books than I can justify. This year, my books took the theme of baking (who'd have thought it!) and among the others was Meet Me at The Cupcake Cafe by Jenny Colgan. Firstly, this book was truly lovely and I can fully recommend it- warning though, it made me want to open my own cafe, so beware! Secondly, this book introduced me to The Caked Crusader and so the challenge begins as I attempt all of her mouth wateringly fantastic cakes. I can't stress enough how much everyone needs to read her blog and try out her recipes- http://thecakedcrusader.blogspot.com/- go bake!!


Lemon Cupcakes

This was the first of The Caked Crusader's recipes that I tried and also the first time that I had ever made Swiss Meringue Buttercream. I can safely say that I- or if I were cruel enough to drag my brother into this, we- failed miserably in terms of the buttercream!

The cupcakes were moist, with a crunchy layer of lemon syrup over the top of them, a result of brushing the left over lemon juice over the cupcakes as soon as they came out of the oven. I used the same method when making my Lemon Drizzle Cake and knew it was a winning idea as soon as I read the recipe.

Despite the fact that my brother and I were both in agreement with The Caked Crusader in her dislike of having rind in a cake, we decided to continue with the recipe and put the rind in the mixture. This provided great flavour but unfortunately the texture just wasn't right for us and we'll know not to do the same again next time!


Unfortunately, as I say, we were unsuccessful in making our Swiss Meringue Buttercream. Our buttercream came out almost like the cream that comes out of a can and had the most undesirable texture. This annoyed me hugely as I knew how lovely the cakes were supposed to be. I eventually asked The Caked Crusader for her help and she suggested that the sugar hadn't dissolved properly and that we were to continue to whisk until the buttercream was smooth and creamy. I think in our haste to have our cupcakes, we skimped on time to allow the sugar to dissolve and were to quick to stop the buttercream from reaching it's potential, leaving us with our disappointing result!

All in all, fabulous cupcakes with a beautiful icing, we just cocked it up somewhat!

Thanks to The Caked Crusader :) 


Ingredients:

For the cupcake:125g unsalted butter, at room temperature
125g caster sugar
2 eggs
125g self raising flour
Juice and rind of one lemon
Dash of milk, if necessary

For the Swiss meringue buttercream:4 egg whites
250g caster sugar
250g unsalted butter
2 teaspoons lemon extract


Method:

Preheat the oven to 190°C/fan oven 170°C/375°F/Gas mark 5.
Line a muffin pan with 12 paper cases.
Start by making the cupcakes. Beat together the butter and sugar until pale and fluffy.
Add the eggs, flour, lemon rind and half the lemon juice.
If necessary (this will depend on the juiciness of your lemon), add a dash of milk and beat until well combined and smooth. You’re aiming for a nice light, almost dropping consistency batter.
Spoon the mixture evenly into the 12 paper cases.
Bake for approximately 15 minutes or until a skewer comes out clean. Mine took 17 minutes.
Remove from the oven and, straight away, brush the remaining lemon juice over the hot cupcakes.
Leave to cool on a wire rack.
Now make the swiss meringue buttercream. Place the egg whites and sugar in a bowl over a pan of simmering water. Stir pretty much constantly to prevent the egg from cooking.
After 5-10 minutes, when the sugar has dissolved, remove the bowl from the pan of simmering water and whisk until the meringue has puffed up and the mix is cool.
Add the butter and lemon extract to the meringue and whisk until the butter has been completely incorporated into the meringue. At first it will look a disaster – it will collapse and look curdled but don’t worry! Stop when the mixture is smooth, light and fluffy.
Spoon the buttercream into a piping bag and swirl onto each cupcake.
Enjoy!

Death by Chocolate

Frankly, I think Death by Chocolate is by far the best way to go, who wouldn't think that?!


As you can see, this cake is not for the faint hearted! As this recipe contains no flour, it takes on the role of one of those wonderful gooey in the middle sort of desserts, probably more suited to being warmed up with custard or cream.

As per usual, the recipe comes from The Great British Book of Baking and is so well written and easy to explain. The recipe also banishes cocoa powder and calls for 'good quality' dark chocolate. I felt it necessary not to rebel against such instructions, how could I insult such a beauty in that way?! As a result, the cake was incredibly rich and I wonder if the icing took it too far over the edge- I can't believe I just typed such an audacious sentence! I guess the occasion could determine such a decision in terms of icing/no icing.

I also felt it necessary to document the whole process step by step. This was for two reasons, the first being that I had never made a cake in this way, and I was amazed. Secondly, I felt the pictures accompanied the instructions perfectly.


These pictures show the mixture before the chocolate is added, puffed up and around 5 times the original volume and also once the chocolate was folded in and it had sunk somewhat.


Despite the cake's promising appearance straight from the oven, my cake sunk much to my disappointment! This was stated in the recipe though so this wasn't too bad. I then, against the instructions, covered the top of the cake in frosting, instead of turning it bottom up which caused the icing to be thicker towards the middle and therefore only possible to eat in minuscule slices!


Unfortunately, this cake wasn't for me but I was sent a doggy bag from my Grandad and it was phenomenal!


Ingredients:

For the cake:
300g good quality dark chocolate
150g unsalted butter, diced
5 medium eggs, at room temperature
1/2 teaspoon vanilla extract
100g caster sugar

For the icing:
200g good quality dark chocolate
100ml double cream

A 22cm springclip tin, greased with butter and the base lined with greaseproof paper


Method:

Preheat the oven to 180°C/350°F/Gas4
Break up the chocolate and put it in a heatproof bowl with the butter. Set over a pan of steaming hot but not boiling water and leave to melt, stirring frequently. Don't let the base of the bowl touch the surface of the water or the chocolate may become to hot and seize up. Once it has melted, remove from the pan and leave to cool
Meanwhile, break the eggs into a large mixing bowl, add the vanilla and whisk for a few seconds just to break the eggs up
Add the sugar and whisk on full power until pale, very thick and mousse like and about 5 times the original volume- this should take about 5 minutes. To test if the mixture is ready, lift out the whisk- if a thick, ribbon like trail of mixture falls back into the bowl and is still visible after 5 seconds you can stop whisking
Pour the chocolate mixture on to the egg mousse and very gently, but thoroughly, fold the two together, using a large metal spoon- take your time, ensuring there are no pockets of chocolate at the bottom of the bowl
Pour the mixture into the prepared tin and bake in the preheated oven for 35-40 minutes, until just firm to the touch- the centre should still be slightly moist under the crust as the cake will continue to cook once out of the oven
Stand the tin on a wire cooling rack and run a round bladed knife around the inside to loosen the sponge. Leave until completely cold before removing the tin. The cake will rise to the top of the tin during baking but will sink on cooling
Invert the cake onto a serving plate- it's easier to ice this part
To make the icing, finely chop the chocolate and put it into a large heatproof bowl with the cream
Set over a pan of steaming hot but not boiling water and make sure the base of the bowl does not touch the water. Leave for a minute or so until the chocolate is half melted, then remove from the pan and beat the chocolate well until glossy
Pour the topping evenly over the cake and let it trickle down the sides- if worked too much it will lose it's shine. Leave until firm
Enjoy!

Friday 12 August 2011

Just a Little Something!

Just thought I'd share this little gem with you!


We had a wedding party at work a few weeks back and this was their cake. I'm not sure if it was their actual wedding cake as they had married in New York and were holding a party for those who weren't there back at home in Newcastle. They also had a four tier cake made from cupcakes, none of which were left over for staff!

Thursday 11 August 2011

Kinder Bueno Cupcakes

These cupcakes are delicious, I love Kinder Buenos! Post Blog update- I remade these properly, try here!


I had an hour to whip up this batch of cakes and figured that some Bueno, no matter of the form it came in, constituted them being called Kinder Bueno cupcakes. The recipe is just a basic vanilla sponge from a book my dad picked up for me- Cupcakes by Shelly Kaldunski.


Although the recipes are a tad tricky and complicated, the book contains sections on ingredients and supplies you'll need, how to fill and frost cupcakes and ideas for decorations. Alongside this, she's categorised her cupcakes for easy finding.

My second confession is that I used pre made buttercream. Again, I did this out of ease and for speed and, much against expectation, Betty Crocker let me down! You could taste too much vanilla and it was blatantly obvious that vanilla essence had been used and not extract, a faux pas on all accounts! The book did come with a vanilla buttercream recipe suggested for the cupcakes which I'll provide below. In future, I shall stop being so lazy...


As a last note, Bueno doesn't work in this sort of cupcake. It dried out after a day and was most unpleasant!

Ingredients:

For the cake:
200g plain flour
1 and 1/2 tsp baking powder
1/4 tsp salt
185g sugar
90g unsalted butter at room temp
1 tsp vanilla extract
125ml whole milk
1 large egg
the white of one large egg

For the buttercream:
3 large egg whites at room temp
185g sugar
pinch of salt
250g unsalted butter, in pieces, room temp
1 tsp vanilla extract

Method:

For the cake:

Position a rack in the middle of the oven a preheat to 180C. Line a muffin pan with paper cases
In a bowl, whisk together the flour, baking powder and salt
In a separate, larger bowl beat the sugar and butter together until light and fluffy. Add the egg and the egg white one by one, beating well after each addition, then beat in the vanilla
Add the flour mixture in three additions, alternating with the milk in two additions (this confused me, basically it's Flour,Milk,Flour,Milk,Flour)
Continue to beat until well combined and there are no signs of flour, don't over beat though
Divide the batter among the cases, roughly 3/4 full and bake until lightly golden, about 18-20 minutes, a skewer should come out clean
Allow them to cool in the pan on a wire rack for 5 minutes and then transfer them onto the rack for roughly an hour

For the buttercream:

In a large, heatproof bowl, combine the egg whites and sugar. Set the bowl over (but not touching) simmering water in a saucepan and heat the mixture, whisking constantly until the sugar has completely dissolved and the mixture is warm to the touch- roughly 2 minutes
Remove the bowl from the saucepan and, using an electric whisk, beat the egg white mixture until it is fluffy, cooled to room temp and holds stiff peaks- roughly 6 minutes
Gradually add the salt and the butter, a few pieces at a time and beat well after each addition. Continue to beat until smooth and creamy, it may appear liquidy after the addition of the butter so keep beating!
Add the vanilla and beat until combined
Use right away and decorate your cupcakes as you wish
Enjoy!

Strawberry Yoghurt Cupcakes

I'd love to find the creator of these little beauties and thank him/her personally!


I find it's a rare occurrence to come across a cupcake that needs no form of icing, frosting or buttercream to add that 'je ne sais quoi' to it. This is one of those recipes...

Having had some left over strawberry yoghurt in my fridge before this blog was created (this is the second time I've made the cupcakes), I decided to let my imagination run away with me and google recipes for Strawberry Yoghurt Cupcakes. Admittedly, I don't remember the website exactly but I do, however, have a printed version of the recipe which reads 'Little Corner of Mine: Strawberry Yogurt Cupcakes' should you wish to find the website.

Despite the huge quantities of all ingredients needed, these cakes are worth the sin value! Although the recipe doesn't state how many cakes you would get, at last count I got 33 cupcakes!


Should you wish to add a frosting, I suggest a simple vanilla or even a strawberry one as I find that they lack somewhat in terms of a strawberry flavouring!

Ingredients:

Don't panic about the use of cups as a measurement, as long as you continue with the same cup throughout it should make no difference

A:  1 1/2 cup all purpose flour (I used plain)
      2 tsp baking powder
      1/4 tsp salt
      1 cup sugar
B:  3/4 cup strawberry flavoured yoghurt
      3 large eggs, whisked
      2 tbsp whole milk
      a drop of red food colouring
      1/2 cup canola oil- I read some bad reviews about this oil and it's many hazards so chose to substitute it with regular vegetable oil


Method:

Preheat oven to 350F (roughly 170C) and place your paper cases in the muffin pan
In a big bowl, add in all of A, mix to combine
Then, make a hole in the center and add in B, mix and blend until incorporated
Lastly, scoop the batter into each case until roughly 3/4 full
Bake for 20-25 minutes or until a skewer through the middle comes out clean
Cool on a wire rack and store in an airtight container in the fridge- if you don't do this, they become oily and sticky!
Enjoy!
Related Posts Plugin for WordPress, Blogger...